
Profile Perfect Level 271 Answer
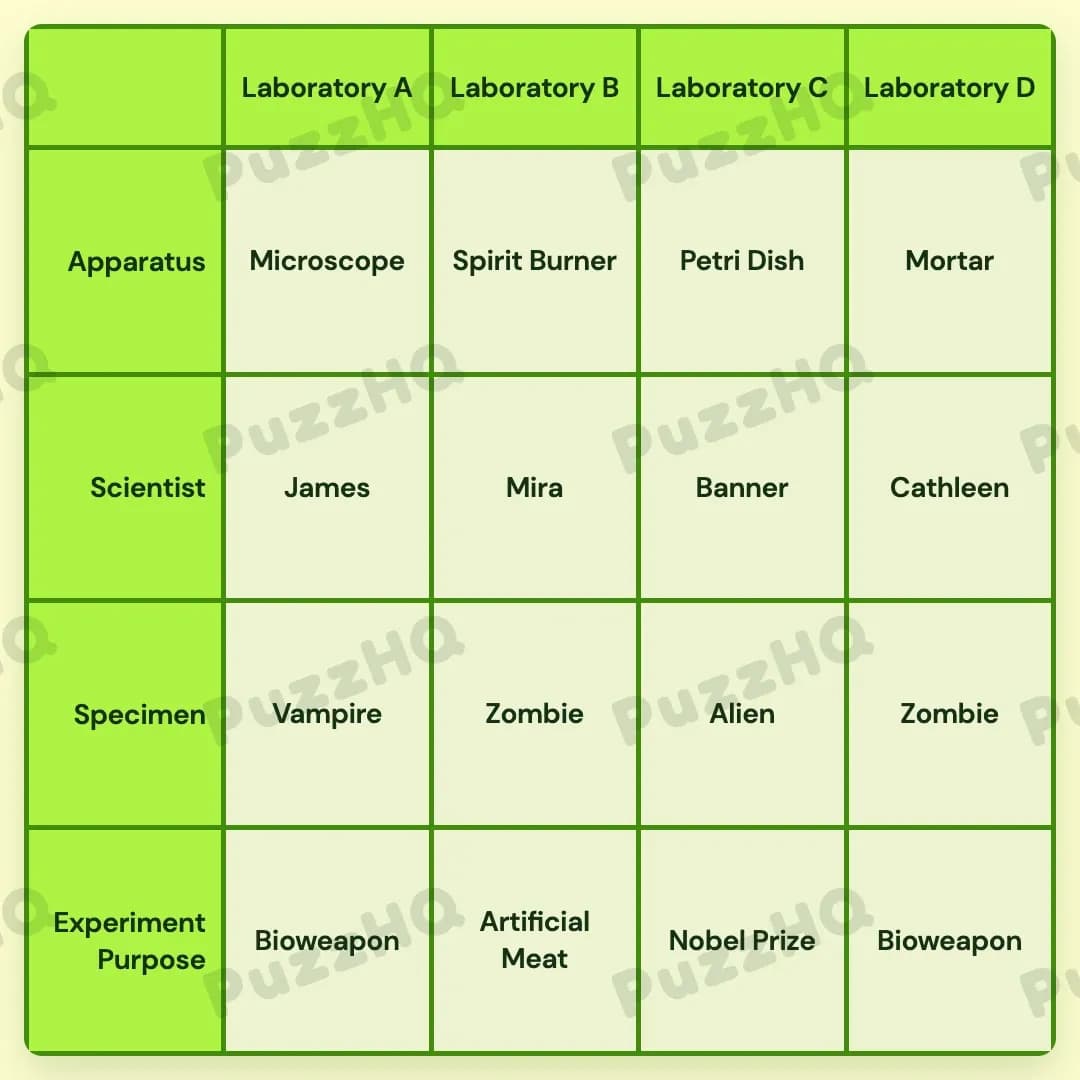
Each laboratory pairs a dedicated scientist and specialized apparatus with a unique specimen and research goal.
| Trait | Laboratory A | Laboratory B | Laboratory C | Laboratory D |
|---|---|---|---|---|
| Apparatus | Microscope | Spirit Burner | Petri Dish | Mortar |
| Scientist | James | Mira | Banner | Cathleen |
| Specimen | Vampire | Zombie | Alien | Zombie |
| Experiment Purpose | Bioweapon | Artificial Meat | Nobel Prize | Bioweapon |
Building The Grid By Trait
Starting with the Scientist and Specimen categories provides the clearest entry into the puzzle because spatial positioning clues immediately narrow down the laboratory assignments across the board.
Scientist And Specimen Establish Spatial Foundations
The spatial structure of the four laboratories becomes apparent when analyzing the relationship between the scientists and their test subjects. One clue states that a Zombie specimen is located directly between Banner and James. For a single subject to sit between two researchers, James and Banner must occupy positions that leave a middle room open, specifically Laboratory A and Laboratory C.
James's exact station is resolved through his test subject, which dies when exposed to sunlight. This trait identifies the specimen as a Vampire, placing it squarely in James's workspace. Because James works with a Vampire rather than a Zombie, his laboratory cannot be the middle station. James takes Laboratory A, which forces the Zombie to Laboratory B and places Banner in Laboratory C.
With James and Banner assigned to Laboratory A and Laboratory C, the remaining scientist slots belong to Mira and Cathleen. Mira is placed at Laboratory B alongside the first Zombie, leaving Cathleen to run Laboratory D. Cathleen's project also involves a Zombie specimen, while Banner's unassigned research in Laboratory C is dedicated to studying the Alien. This resolves both the Scientist row and the Specimen row in tandem.
Apparatus And Purpose Define The Laboratory Objectives
Once the researchers and their specimens occupy fixed rooms, the Apparatus and Experiment Purpose traits fall into place by matching practical procedures to specific laboratory needs.
Laboratory C quickly gains its research direction through the mention of cultivation. The clue stating that something cultivated in a dish may win a Nobel Prize links the Petri Dish apparatus directly to the Nobel Prize experiment purpose. Since Banner at Laboratory C is cultivating an Alien, this laboratory claims both the Petri Dish and the Nobel Prize objective.
The remaining equipment and goals connect to the daily tasks performed on the specimens. James is observed looking closely at bacteria, which requires the Microscope at Laboratory A. His research in Laboratory A is targeted toward developing a Bioweapon.
At the other end of the facility, Cathleen at Laboratory D is tasked with creating a mass destruction weapon, establishing another Bioweapon project. Her physical preparation involves grinding a Zombie organ, which designates the Mortar as her primary apparatus.
Finally, Mira at Laboratory B is searching for survival resources in a post-apocalyptic world. Her purpose is the production of Artificial Meat from her Zombie specimen. Because her process involves sterilizing bacteria on the specimen's skin, her assigned apparatus is the Spirit Burner.
Where The Trait Rows Intersect
Sunlight Vulnerability Links Scientist Identity To Specimen Type
The interaction between the Scientist row and the Specimen row is the linchpin that unlocks the entire layout. The clue regarding sunlight sensitivity does not mention James's laboratory letter directly, but it defines his specimen as a Vampire.
Cross-referencing this fact with the spatial clue involving Banner, James, and the Zombie prevents James from being placed in the middle of the complex. Instead, it anchors James at Laboratory A, locks Banner at Laboratory C, and immediately defines the specimen at Laboratory B as a Zombie. Without combining these two distinct traits, neither the scientist order nor the room positions could be resolved.
Dish Cultivation Merges Tooling With Nobel Aspirations
The clue connecting the dish to a Nobel Prize unites the Apparatus row and the Experiment Purpose row into a single compound block. Rather than resolving the equipment and the ambition separately, this clue treats the Petri Dish and the Nobel Prize as a paired unit.
Because Laboratory A, Laboratory B, and Laboratory D already have distinct specimen demands and research directions, Laboratory C is the only station capable of accepting both the cultivation dish and the pursuit of scientific prestige.
Post-Apocalyptic Needs Separate The Two Zombie Facilities
Two separate rooms house a Zombie, which could cause significant ambiguity without the cross-trait clues linking purpose and apparatus. Laboratory B and Laboratory D are distinguished by how each scientist interacts with the same specimen type.
Mira's focus on post-apocalyptic survival connects her Zombie to Artificial Meat and the sterilizing heat of the Spirit Burner. In contrast, Cathleen's assignment to create a weapon connects her Zombie to the Mortar used for grinding organs and the Bioweapon classification. The interplay between purpose and apparatus cleanly separates two identical specimens across different rooms.
Final Grid Check
Every category in the completed grid reinforces the others without contradiction. The scientists occupy their required spatial order, the apparatuses directly enable the specific physical tasks described, and the experiment purposes align naturally with the specimens under examination.
Comments