
Profile Perfect Level 210 Answer
A careful balance of conveyor positions, relative pricing math, and adjacent plate hues reveals how every sushi master and platter style aligns across the bar.
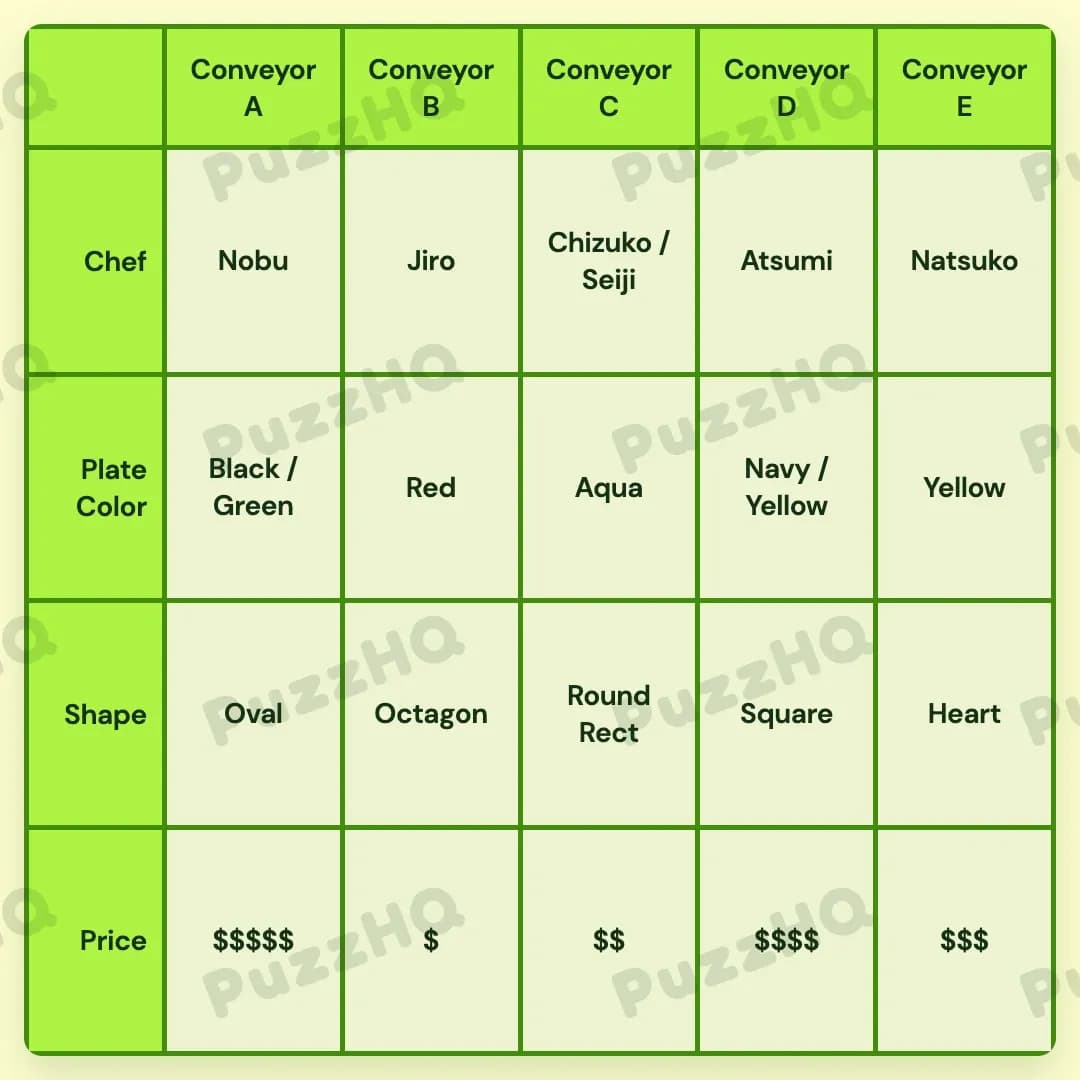
| Trait | Conveyor A | Conveyor B | Conveyor C | Conveyor D | Conveyor E |
|---|---|---|---|---|---|
| Chef | Nobu | Jiro | Chizuko / Seiji | Atsumi | Natsuko |
| Plate Color | Black / Green | Red | Aqua | Navy / Yellow | Yellow |
| Shape | Oval | Octagon | Round Rect | Square | Heart |
| Price | $$$$$ | $ | $$ | $$$$ | $$$ |
The Logic Behind Profile Perfect Level 210
At first glance, this puzzle appears to hinge on culinary aesthetics, but the entire solve is driven by an underlying pricing staircase paired with spatial chains across the five conveyors. Once the financial tiers lock into position, the physical ordering of plates and chefs neatly fills the gaps.
Pricing Establishes the Baseline Order
The quickest route into the puzzle starts with cost. We learn immediately that Conveyor B serves sushi that anyone can afford, locking it in as the single dollar tier. From there, the price comparison clues build a clean mathematical ladder. Conveyor D costs four times as much as Conveyor B, giving Conveyor D the four dollar tier.
With Conveyor B at one dollar and Conveyor D at four dollars, the remaining pricing tiers fall into place through chef comparisons. Nobu charges enough that a single meal nearly equals two meals at Natsuko's station. That ratio only works if Nobu sits at the five dollar tier and Natsuko takes the three dollar tier, which automatically leaves the two dollar tier for Conveyor C.
The shape assignments begin to intertwine here as well. The track with the most edges corresponds to the least expensive bar, placing the Octagon at Conveyor B. Meanwhile, Conveyor E is explicitly identified as Heart-shaped, and the Square conveyor is described as being pricier than three other sushi bars, confirming it sits at Conveyor D.
Spatial Anchors Settle the Middle Track
With the shapes and prices anchored, positional clues start bridging the gap across the layout. We are told that the Red plate sits directly between the egg-shaped conveyor and Chizuko. Because Conveyor B is already established as the Red plate station, the egg-shaped Oval track has to be Conveyor A, while Chizuko operates to the right at Conveyor C.
This placement opens up the chef assignments along the line. Jiro sits between Black and Aqua plates. Since Conveyor B houses Jiro on the Red plate, Black must belong to the left at Conveyor A, while the water-colored Aqua plate belongs to Chizuko at Conveyor C.
At the same time, Atsumi plates on Navy right next to Chizuko, claiming Conveyor D. That leaves Nobu at Conveyor A and Natsuko at Conveyor E, completing the structural foundation of the lineup.
Overlapping Traits Complete the Outer Rails
The final details resolve by respecting the flexible plate associations and chef overlaps. Nobu is paired with the Green plate, but since Conveyor A already carries Black from the positional clue, Conveyor A naturally holds the combined Black and Green attributes. This agrees with the rule that Green is never used at the Square conveyor on track D.
Similarly, Yellow plate notes indicate that Seiji does not use Yellow, and Seiji does not serve at the cheapest bar. This allows Seiji to share the Conveyor C slot alongside Chizuko, while Yellow claims a home on Conveyor E and shares space with Navy at Conveyor D. With the Round Rect shape claiming the lone open spot at Conveyor C, the entire sushi bar reaches complete harmony.
The Clue I Would Read Twice
The pivotal line in this layout is the statement that getting sushi at Nobu's almost gets you two meals at Natsuko's.
It is easy to brush past this as a vague flavor note, but it is actually the linchpin that fixes the entire upper end of the price scale. Without recognizing that five dollars is just shy of twice three dollars, the relative ranks of Nobu and Natsuko remain completely fluid. Pairing that calculation with the four to one ratio between Conveyors D and B turns what could have been an ambiguous list of prices into a rigid, sequential lock.
Final Thoughts
What makes 210 memorable is how neatly the conveyor geometry mirrors the pricing structure. The puzzle never relies on obscure trivia, asking instead that you treat every track as a coordinate on a line. Once you realize the center track acts as the fulcrum for both plate colors and chef identities, the entire sushi line slides smoothly into order.
Comments