
Profile Perfect Level 169 Answer
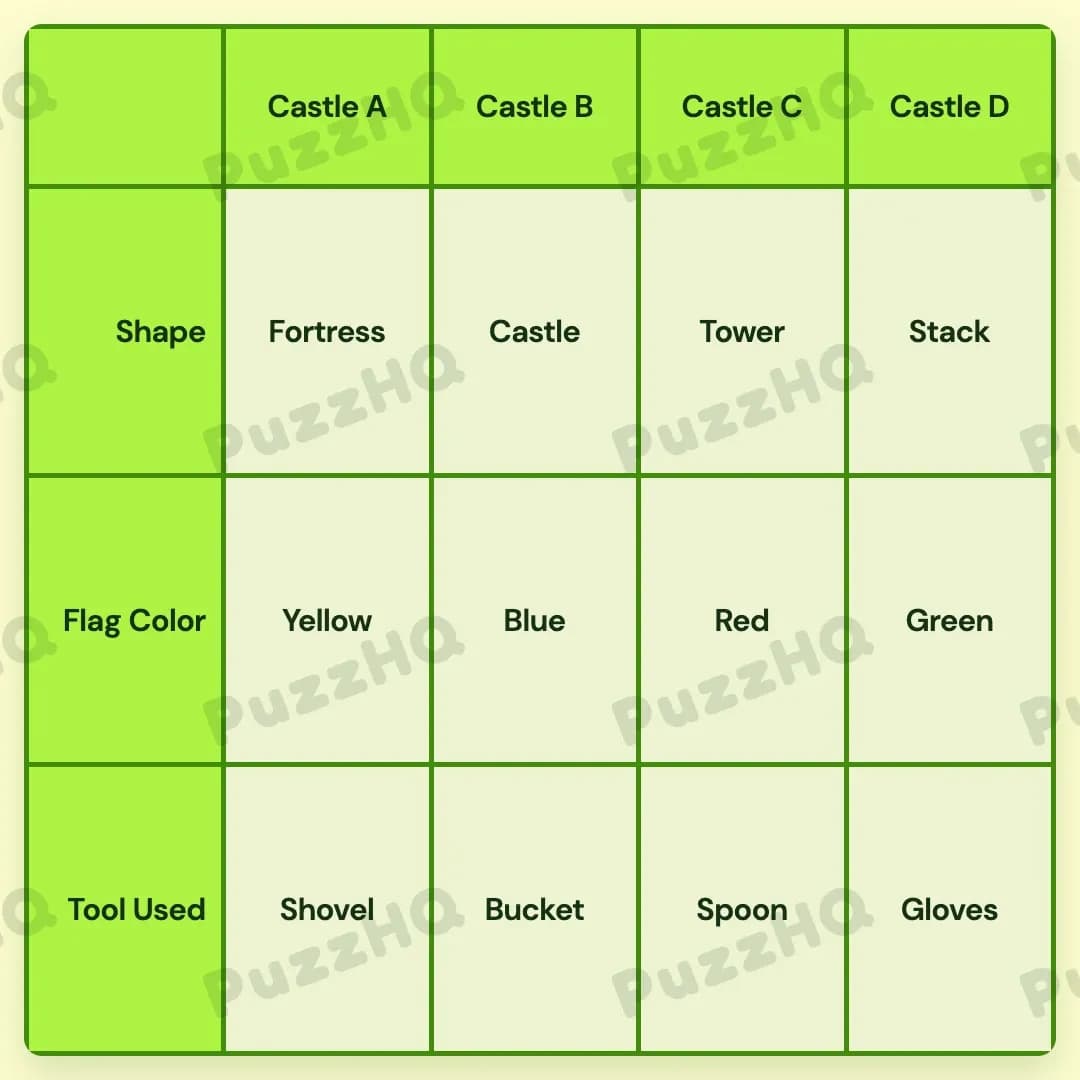
By anchoring Castle B's tool and Castle D's shape first, you can use neighbor restrictions and distance rules to determine every castle profile with certainty.
| Trait | Castle A | Castle B | Castle C | Castle D |
|---|---|---|---|---|
| Shape | Fortress | Castle | Tower | Stack |
| Flag Color | Yellow | Blue | Red | Green |
| Tool Used | Shovel | Bucket | Spoon | Gloves |
How To Think Through Profile Perfect Level 169
The most reliable habit for this puzzle is locking down absolute positional anchors before attempting to place linked trait bundles. When clues describe items that are grouped together, you cannot always place them immediately. By establishing fixed references along the line of castles first, you create reliable boundary conditions that turn spatial clues like distance and adjacency into quick deductions.
Start With Absolute Anchors: Castle D Takes The Stack Shape And Castle B Takes The Bucket
Direct placement clues give you firm anchors on the board. You should always look for clues that mention specific subjects or extreme edge positions before worrying about relative comparisons.
Two clues give you immediate anchors:
- Clue 1 states that the rightmost castle stacked layers on top. Because the castles are arranged in sequence from Castle A to Castle D, the rightmost subject is Castle D. You can immediately assign the Stack shape to Castle D.
- Clue 2 states that the Bucket was used to move sand for Castle B. This is a direct match that fixes the Bucket tool to Castle B.
These two placements establish critical fixed points. Castle D is now locked with its shape, and Castle B is locked with its tool.
Combine Trait Bundles With Elimination: Placing Gloves And The Green Flag
A trait bundle occurs when two traits from different categories are linked together without naming a specific subject. Instead of guessing where the pair goes, look for negative adjacency clues that eliminate positions.
- Clue 3 links two traits directly: the Green flag was placed using Gloves. Wherever the Green flag goes, Gloves must follow.
- Clue 4 adds a spatial restriction: there is no Green flag next to the Bucket.
Now examine the board to see where the Green flag and Gloves bundle can fit:
- Castle B already has the Bucket, so Castle B cannot take Gloves.
- Castle B's immediate neighbors are Castle A and Castle C. Because the Green flag cannot sit next to the Bucket, neither Castle A nor Castle C can have the Green flag.
- This eliminates Castle A, Castle B, and Castle C as options for the Green flag and Gloves bundle.
The only possible location remaining is Castle D. You can safely assign both the Green flag and the Gloves to Castle D.
Use Positional Distance And Direct Adjacency: Assigning The Shovel And Spoon
Once an edge subject has its traits locked, distance and neighbor clues become straightforward deductions. Castle D sits on the far right edge, which makes measuring distance simple.
- Clue 5 states that the Shovel is the farthest from the Green flag. The Green flag sits at Castle D. On a four subject horizontal line, the position farthest from Castle D is Castle A on the far left. Therefore, Castle A must have the Shovel tool.
- Clue 6 states that the Spoon used for small detailing is next to Gloves. Gloves belong to Castle D. The only neighbor adjacent to Castle D is Castle C. Therefore, Castle C must have the Spoon tool.
With the Shovel at Castle A, the Bucket at Castle B, the Spoon at Castle C, and the Gloves at Castle D, the entire Tool Used category is fully solved.
Connect Shape Clues And Resolve The Remaining Neighbors: Placing The Fortress And Flags
Now that the tools are locked, use tool associations to assign shapes, followed by negative neighbor checks to place the final flags.
- Clue 7 states that the Tower castle was carved using the Spoon. Since Castle C uses the Spoon, Castle C's shape must be the Tower.
- Only two shapes remain unassigned: Fortress and Castle, belonging to Castle A and Castle B.
- Clue 8 bundles the Fortress shape with the Yellow flag and notes that the Yellow-flagged Fortress is not beside the Red flag.
Consider where the Fortress can go:
- If Castle B were the Fortress, Castle B would hold the Yellow flag. Its neighbors are Castle A and Castle C. The remaining unassigned flags are Blue and Red. If Castle B were Yellow, then either Castle A or Castle C would have to receive the Red flag. That would place the Red flag directly next to the Yellow-flagged Fortress, violating Clue 8.
- Therefore, Castle B cannot be the Fortress. Castle A must be the Fortress, which automatically gives Castle A the Yellow flag.
With Castle A taking the Fortress shape, the only remaining shape is the standard Castle, which belongs to Castle B.
To finish the flags, look at the remaining colors: Blue and Red for Castle B and Castle C.
- Because the Yellow-flagged Fortress is at Castle A, its immediate neighbor Castle B cannot have the Red flag.
- Therefore, Castle B must take the Blue flag.
- The remaining Red flag belongs to Castle C.
Every cell in the grid is now completely solved.
What This Level Teaches You
1. Edge Anchors Simplify Distance Clues
When a puzzle mentions that an item is the farthest from another, locate the reference item on the grid first. When that reference sits on an extreme boundary, such as Castle D on the far right, the farthest possible spot can only be the opposite boundary, Castle A on the far left. You do not need to test middle options when an edge reference is already established.
2. Form Bundles Before Evaluating Board Position
Clues that tie two traits together without a subject name, such as the Green flag and Gloves, are best treated as a single compound unit. Once you recognize that the pair must move together, any clue eliminating either the tool or the flag eliminates that entire subject slot from contention.
3. Check Neighbor Capacity To Prevent Impossible Layouts
When placing a trait with negative adjacency rules, look at how many neighbors the target spot touches. Placing the Yellow-flagged Fortress in a middle slot like Castle B would expose it to two neighbors, forcing an adjacency conflict with the Red flag. Placing it on the edge at Castle A limits its exposure to a single neighbor, allowing the Red flag to sit safely on the other side of Castle B.
Final Thoughts
Solving this level smoothly relies on using negative adjacency clues to eliminate middle positions. By bundling traits together and locking in the outer boundaries first, you avoid unnecessary guesswork and let spatial rules guide every step.
Comments