
Profile Perfect Level 180 Answer
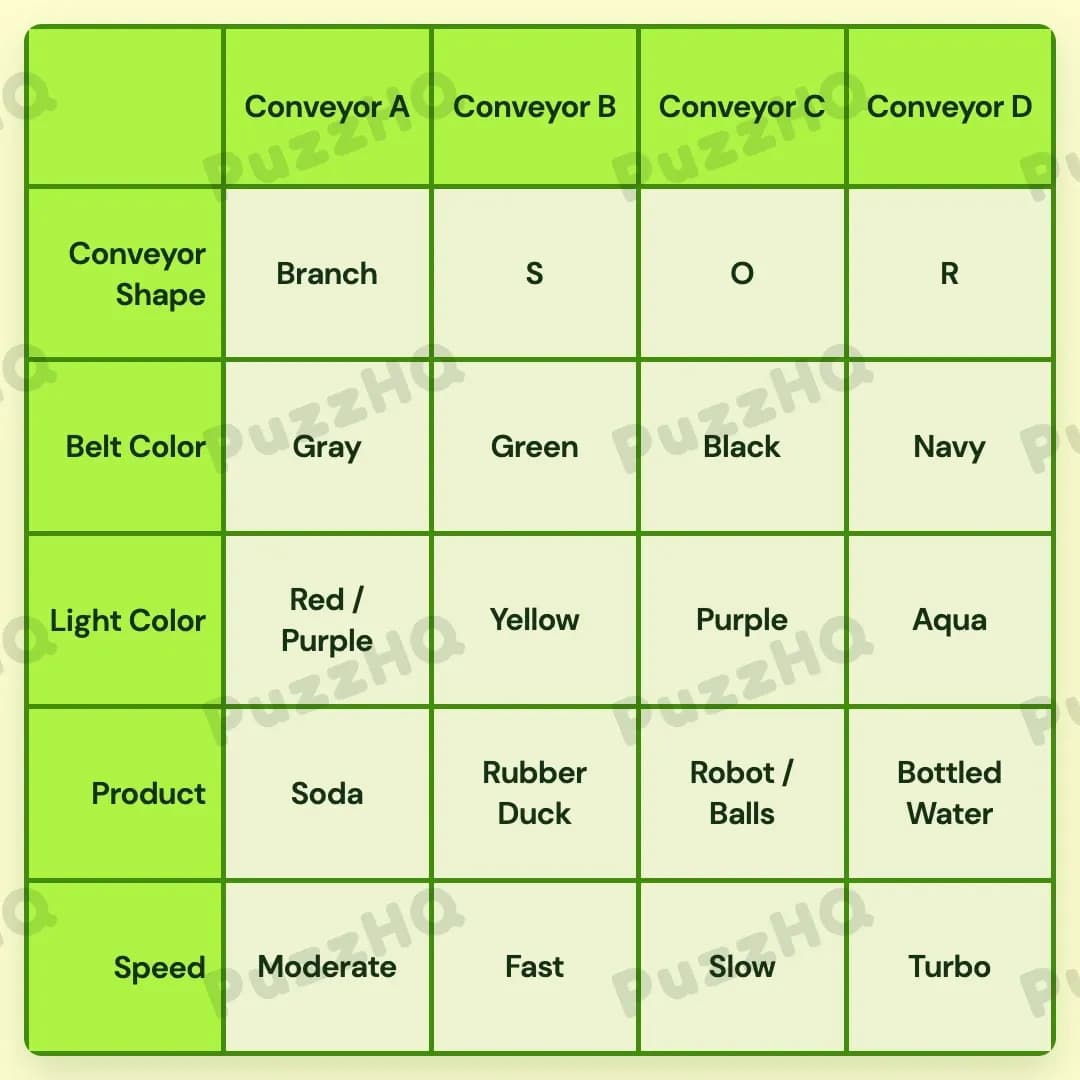
Spoiler alert: Below is the complete setup for all four factory conveyors, detailing every shape, color, speed, and product.
| Trait | Conveyor A | Conveyor B | Conveyor C | Conveyor D |
|---|---|---|---|---|
| Conveyor Shape | Branch | S | O | R |
| Belt Color | Gray | Green | Black | Navy |
| Light Color | Red / Purple | Yellow | Purple | Aqua |
| Product | Soda | Rubber Duck | Robot / Balls | Bottled Water |
| Speed | Moderate | Fast | Slow | Turbo |
The Logic Behind Profile Perfect Level 180
This grid finds its footing through positional geometry and mechanical pacing. Rather than forcing you to juggle abstract logic chains right away, the puzzle rewards a careful reading of how the factory floor is laid out from left to right. Once the extreme ends and relative line speeds are established, the physical tracks and their cargo slot neatly into place.
Mapping the Physical Shapes Across the Floor
The natural starting point is spatial positioning. We learn early on that the conveyor line featuring a sharp ninety degree turn sits farthest from Conveyor A. Across a four column layout from Conveyor A through Conveyor D, the farthest possible spot is Conveyor D. That immediately assigns the right angled R shape to Conveyor D at the far right edge of the board.
From there, the remaining track geometries fall into line through descriptive clues. Conveyor A takes the branching path, which is directly linked to how its speed compares to Conveyor B. Meanwhile, the line responsible for building robots forms a complete closed loop. That closed loop defines the round O shape on Conveyor C. With three positions resolved, Conveyor B claims the winding S shape by process of elimination.
Setting the Speeds and Distributing the Cargo
With the structural tracks settled, attention turns to the pacing of each line. We know that the branching line on Conveyor A runs a bit slower than Conveyor B, creating an immediate relative speed hierarchy. More critically, the slowest line on the floor is the one handling a variety of products, while a beverage product sits to the right of that slowest line.
Because Conveyor A already produces soda, the only beverage that can sit to the right of a line is bottled water on Conveyor D. For bottled water on Conveyor D to be to the right of the slowest line, Conveyor C must be the slowest line in the shop. Conveyor C therefore takes the slow rating along with the varied product load of robots and balls.
That placement allows the remaining speeds and products to settle comfortably. Conveyor D takes the maximum turbo speed, while Conveyor B takes fast, leaving Conveyor A at moderate speed to satisfy the rule that the branching line is slower than Conveyor B. On the product side, classic bath toys in the form of rubber ducks go to Conveyor B, safely separated from the balls rolling along Conveyor C.
Aligning the Belts and Light Indicators
The final stage of the solve centers on color coordination across belts and indicator lights. A key positional clue notes that the green belt sits directly between conveyors illuminated by purple lights. Conveyor B sits precisely between Conveyor A and Conveyor C. Conveyor B must therefore carry the green belt, while both Conveyor A and Conveyor C receive purple lighting. Conveyor A also accommodates a dual red and purple light designation, which nicely satisfies the rule requiring red light to be more than two columns away from the fastest turbo line on Conveyor D.
The remaining color assignments resolve smoothly through specific restrictions. The conveyor producing balls avoids both green and gray belts, which directs the black belt onto Conveyor C and assigns the gray belt back to Conveyor A. Finally, Conveyor D requires belt and light colors from within the same shade family. With navy belt and aqua lighting available, Conveyor D receives its cool toned blue pairing, leaving yellow light to finish Conveyor B.
The Clue I Would Read Twice
"The Green belt is between the Purple light ones" is the linchpin that effortlessly binds column placement and color traits together. At first glance, a solver might wonder whether it refers to two separate conveyors or a single split light setup. Recognizing that Conveyor B is flanked by Conveyor A and Conveyor C immediately anchors three columns simultaneously. It solves the belt color for Conveyor B while establishing purple light indicators on both sides, making the rest of the color deduction remarkably clean.
Final Thoughts
What makes Level 180 so engaging is how naturally the mechanical themes reinforce the logic. Track shapes, line velocities, and product types feel like a functioning packaging plant where layout dictates operations. Once you align the slowest line with its neighboring beverage, the entire assembly line runs with clockwork precision.
Comments