
Profile Perfect Level 323 Answer
Spoiler warning: The complete solution for this level is detailed below. If you only want a hint to get past a tricky deduction, scroll down to the specific question causing you trouble.
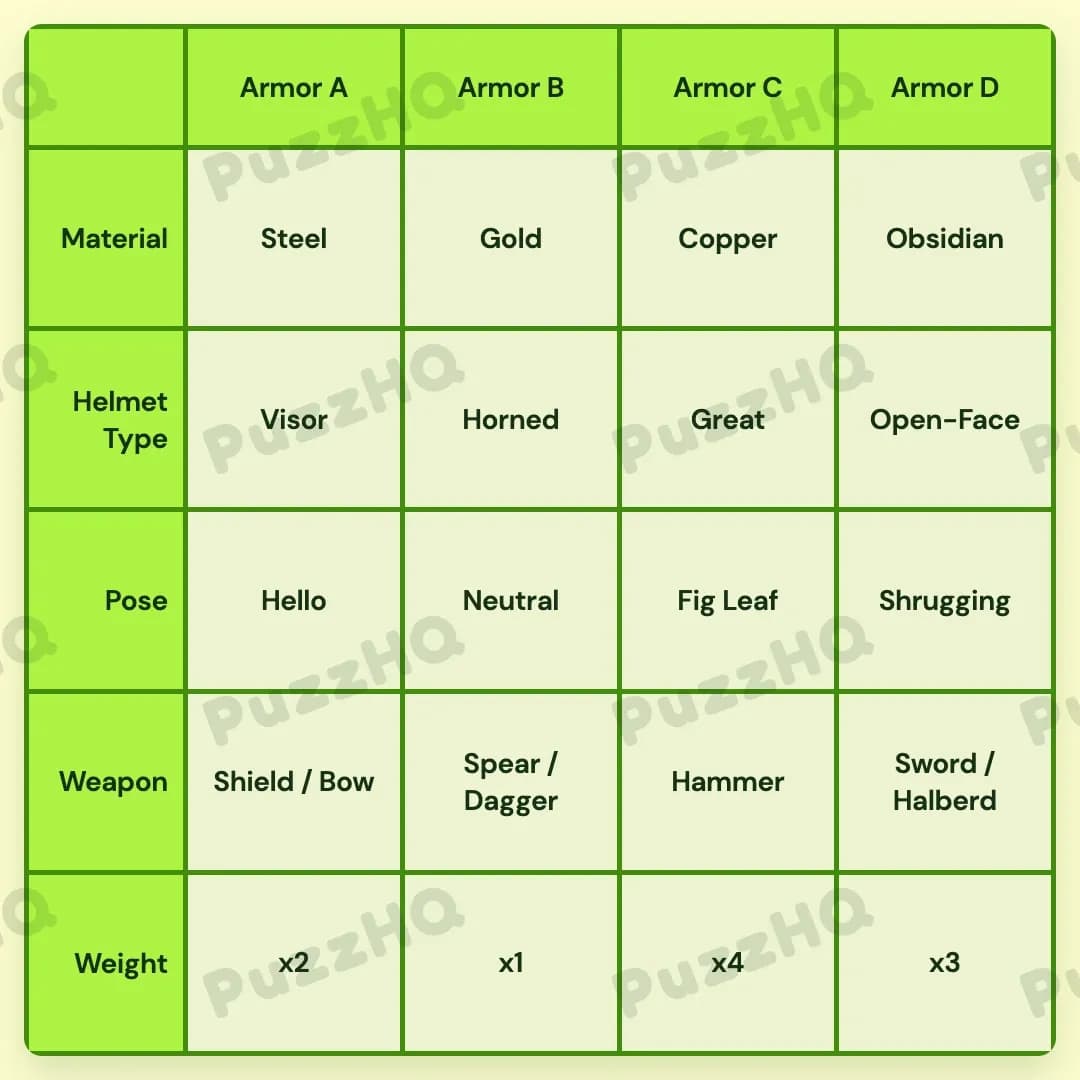
| Trait | Armor A | Armor B | Armor C | Armor D |
|---|---|---|---|---|
| Material | Steel | Gold | Copper | Obsidian |
| Helmet Type | Visor | Horned | Great | Open-Face |
| Pose | Hello | Neutral | Fig Leaf | Shrugging |
| Weapon | Shield / Bow | Spear / Dagger | Hammer | Sword / Halberd |
| Weight | x2 | x1 | x4 | x3 |
Stuck On Profile Perfect Level 323?
This puzzle hinges on sorting out the materials and weights before trying to place every weapon combination. Several clues depend on relative positions and weights, so anchoring the columns early makes the helmet and pose pairings fall into place much faster.
Which Armors Get Made From Which Materials?
Start with the leftmost spot. You are directly told that the leftmost armor is Steel, which places Steel in Armor A.
From there, another clue notes that the material two columns away from Steel is Copper. Counting two columns to the right from Armor A brings you directly to Armor C, locking Copper into that slot.
That leaves Gold and Obsidian for Armor B and Armor D. We learn that Obsidian is heavier than Steel, and Copper is the heaviest of all the sets. Because the available weight tiers are x1, x2, x3, and x4, Obsidian must take x3 while Steel takes x2. Since Armor B must hold the lightest weight value (x1) to satisfy the dagger clue, Obsidian cannot go in Armor B. Obsidian belongs in Armor D, which leaves Gold in Armor B.
How Do You Determine The Four Weight Tiers?
The weight assignments become clear once you connect the material clues to the weapon descriptions:
- Copper is explicitly identified as the heaviest armor, so Copper in Armor C takes the x4 weight.
- The decorative armor carrying the Dagger is described as the lightest, which gives it the x1 weight.
- Obsidian is heavier than Steel. With x1 and x4 already spoken for, Obsidian must be x3 and Steel must be x2.
Assigning x2 to Armor A (Steel), x4 to Armor C (Copper), and x3 to Armor D (Obsidian) leaves x1 for Armor B (Gold).
Where Do The Weapons Belong Across The Display?
A crucial clue states that the Shield and the Spear are not found in the right half of the display. This restricts both weapons entirely to Armor A and Armor B.
Next, look at the Spear clue: the Spear is paired with a small short-ranged weapon. The Dagger fits this description, meaning the Spear and Dagger belong together in the same slot. We already know the Dagger belongs to the lightest armor (x1), which is Armor B. That gives Armor B the Spear / Dagger combination.
Because the Shield must also be in the left half, it has to go to Armor A. The clue mentioning that the armor next to the lightest one has a Bow with another weapon confirms this. Armor A is right next to Armor B, so Armor A receives the Shield / Bow pair.
For the right half, the clue about a blunt weapon placed under the Great helmet refers to the Hammer. Copper in Armor C takes the Great helmet and the Hammer. The remaining weapon set, Sword / Halberd, fills the final slot in Armor D.
How Do The Helmets And Poses Pair Up?
Once materials and weapons are locked in, matching the helmets and poses is straightforward:
- Armor A: The clue describing a person saying hi while refusing to lift their visor connects the Hello pose and the Visor helmet directly to Armor A.
- Armor B: The clue stating that the armor in a Neutral pose has a Dagger on its side places the Neutral pose in Armor B. Furthermore, Gold armor is explicitly paired with the ceremonial Horned helmet, locking the Horned helmet into Armor B.
- Armor C: The heaviest Copper armor has its pose described as having both hands at the front, which corresponds to the Fig Leaf pose. Combined with the blunt weapon clue, Armor C gets the Great helmet.
- Armor D: With Visor, Horned, and Great placed in the first three columns, the Open-Face helmet belongs to Armor D. This matches the clue about the helmet with the least protection. The remaining Shrugging pose completes Armor D.
One Clue You Should Not Overthink
The clue stating that the material two columns away from Steel is Copper might make you wonder whether to count to the left or to the right. Because Steel is already locked into Armor A on the far left edge, you can only move to the right. Skipping column B and landing on column C gives you the exact location of Copper without any ambiguity.
Quick Answer Check
To verify your solution at a glance, check these key anchors: Armor A is Steel with a Visor and Shield / Bow (x2), Armor B is Gold with Horned helmet and Spear / Dagger (x1), Armor C is Copper with Great helmet and Hammer (x4), and Armor D is Obsidian with Open-Face helmet and Sword / Halberd (x3). If your weight progression reads x2, x1, x4, x3 from left to right, your grid is fully correct.
Comments