
Profile Perfect Level 419 Answer
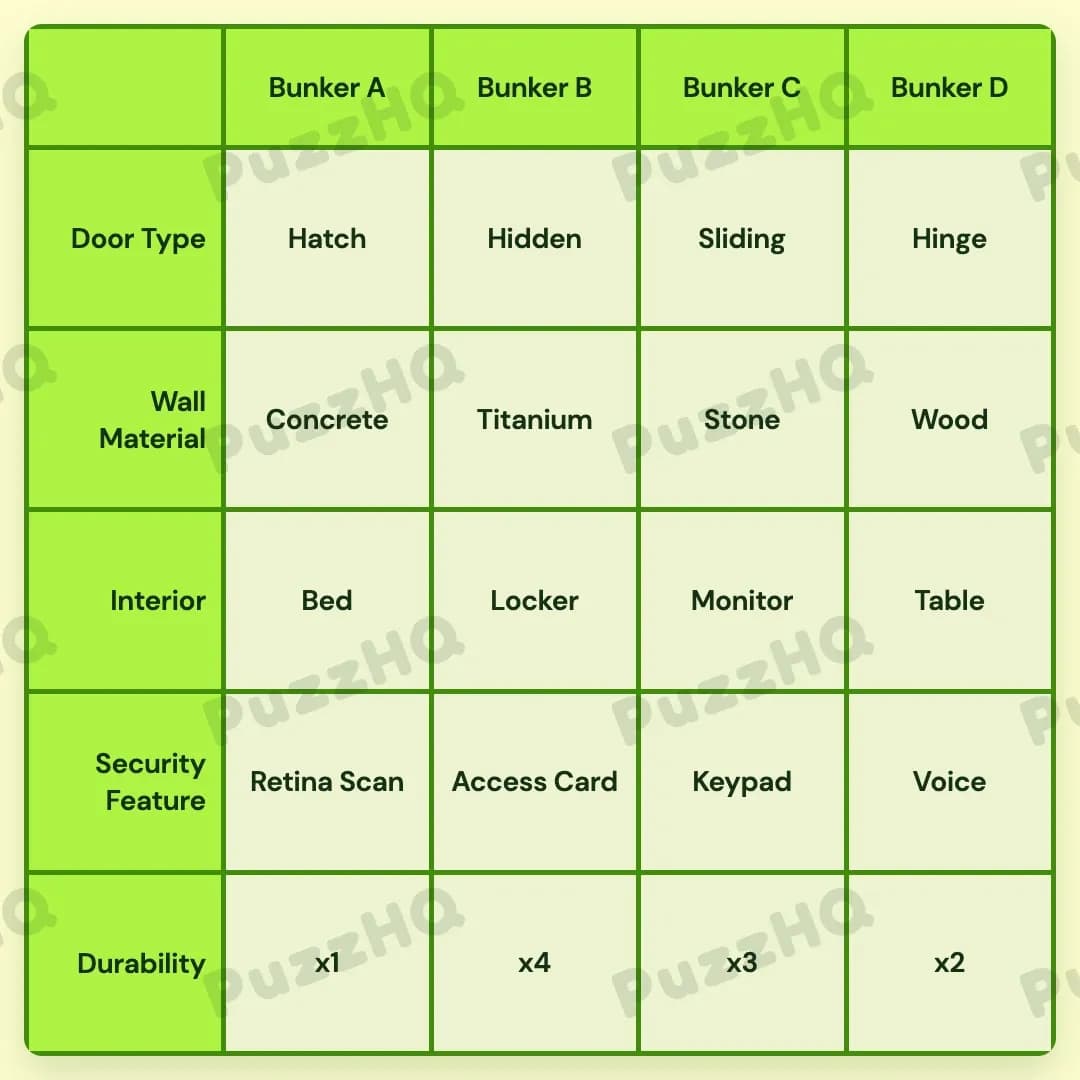
A careful study of structural durability and personal entry quirks reveals the complete architectural blueprint for all four underground shelters.
| Trait | Bunker A | Bunker B | Bunker C | Bunker D |
|---|---|---|---|---|
| Door Type | Hatch | Hidden | Sliding | Hinge |
| Wall Material | Concrete | Titanium | Stone | Wood |
| Interior | Bed | Locker | Monitor | Table |
| Security Feature | Retina Scan | Access Card | Keypad | Voice |
| Durability | x1 | x4 | x3 | x2 |
The Logic Behind Profile Perfect Level 419
The structural identity of this puzzle hinges on how security protocols and physical building materials lock down specific bunker positions. Rather than getting lost in scattered details, the solve becomes manageable the moment you translate behavioral security clues into specific access hardware and pin them against the four positions in the row. Once the extreme security features and material placements find their footing, the remaining doors, furnishings, and durability ratings slot into place through clean process of elimination.
Establishing Anchors Across the Bunkers
The first clear entry point comes from the distinct access methods required by the bunker owners. Bunker D immediately claims the voice recognition mechanism because its owner must sing to gain entry. That places the voice feature squarely in the rightmost slot. Meanwhile, we know the access card grants entry to the most durable shelter in the complex. Looking at the four bunkers, the bunker holding the monitor sits directly beside the access card holder.
This pairing between the access card and the monitor narrows down the durability and security distribution. Placing the access card at Bunker B matches it with the maximum durability rating of x4, which cleanly positions the neighboring monitor inside Bunker C. Because the bunker requiring a PIN must be stronger than some of the others, the keypad security feature finds its natural home at Bunker C with a durability rating of x3, well above the baseline.
Walls and Doors Settle the Layout
With the middle positions beginning to take shape, the wall materials and door types provide the necessary structural framework. The sliding door is permanently attached to the stone wall, creating an inseparable pair. However, concrete walls cannot sit next to this sliding door. Placing the stone wall and sliding door at Bunker C satisfies this constraint nicely, provided that concrete is kept away from Bunker B and Bunker D's direct border.
Concrete and titanium walls also avoid sitting next to the shelter with the second least durable rating. With durability ratings spanning x1 through x4, Bunker D holds x2 durability and Bunker A holds x1. This places the concrete wall at Bunker A, keeping it separated from Bunker C by the reinforced titanium wall at Bunker B. The remaining wooden wall settles naturally onto Bunker D, bringing along the hinge door to complete the outer boundary.
Furnishings and Final Clearances
The remaining interior details fall into line once personal routines are accounted for. The bunker furnished with a bed requires its occupant to remove her glasses, a specific detail that directly pairs the bed with the retina scanner at Bunker A. This leaves the hidden door mechanism for Bunker B, where the entrance remains concealed until the access card is scanned.
Furniture placement wraps up quickly from here. The table cannot sit in the bunker immediately adjacent to the bed, which rules out Bunker B and sends the table directly to Bunker D. With the table at Bunker D, the monitor already logged at Bunker C, and the bed at Bunker A, the locker becomes the only remaining option for Bunker B. The hatch door naturally covers Bunker A, concluding the full layout without leaving any ambiguity in the grid.
The Clue I Would Read Twice
The instruction stating that the bunker with the bed requires the owner to take off her glasses is easily the most rewarding clue to analyze. At first glance, taking off glasses sounds like a bedtime ritual, which might tempt you to treat it purely as flavor text for the bed. In reality, it serves a dual mechanical purpose by pointing directly to an optical biometric security device. Connecting the removal of eyewear to the retina scan at Bunker A establishes the entire left side of the board and prevents confusing the scanner with the keypad or access card.
Final Thoughts
What makes this installation stand out is how neatly thematic quirks translate into precise logic grid entries. Singing at the threshold, taking off glasses, and hiding doors behind card readers give each shelter a distinct personality while still functioning as rigid deduction points. Once the physical security devices are decoded, the underground layout reveals itself with steady, satisfying momentum.
Comments