
Profile Perfect Level 529 Answer
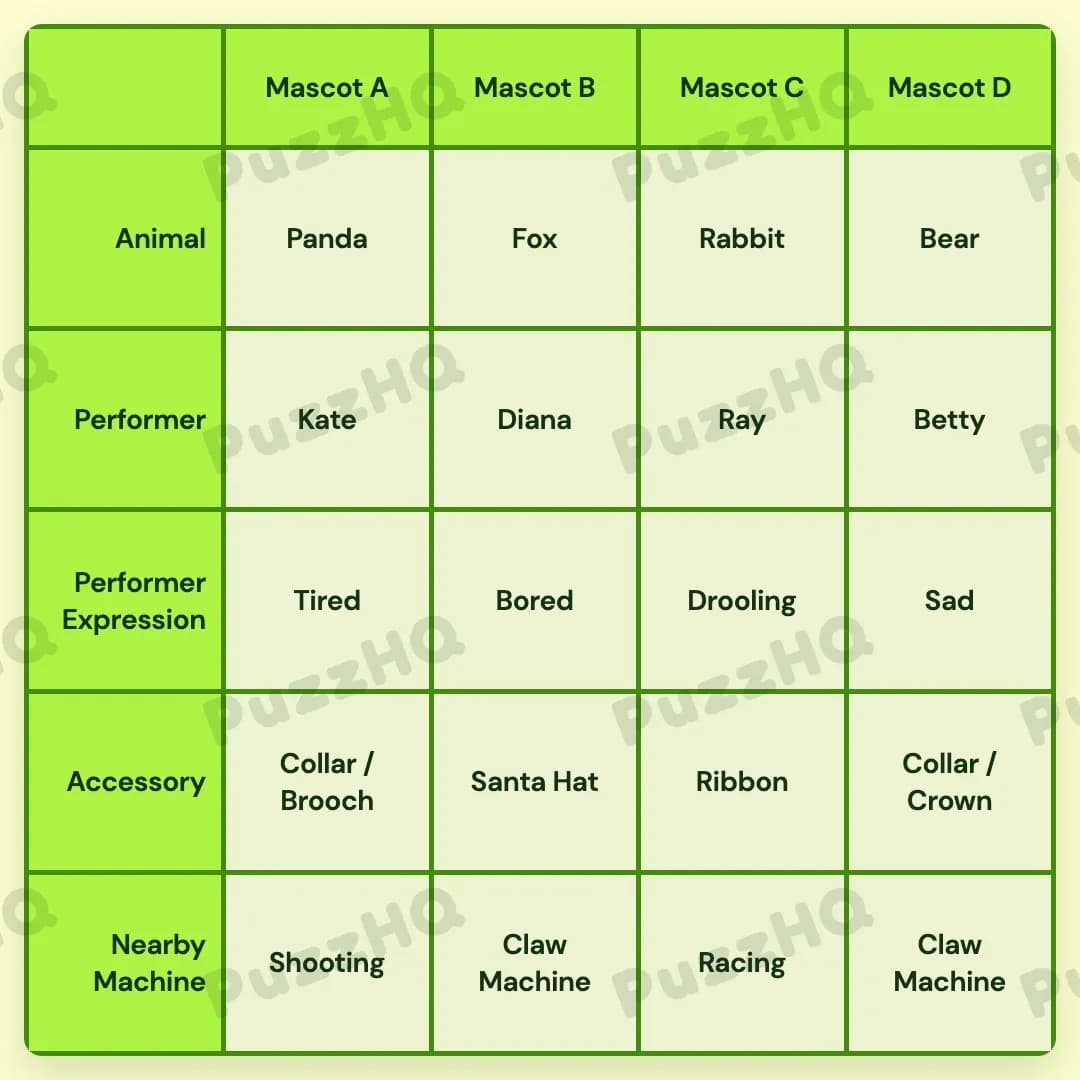
By matching animal costumes with performers' emotional states, the four mascot positions across the entertainment floor quickly fall into place.
| Trait | Mascot A | Mascot B | Mascot C | Mascot D |
|---|---|---|---|---|
| Animal | Panda | Fox | Rabbit | Bear |
| Performer | Kate | Diana | Ray | Betty |
| Performer Expression | Tired | Bored | Drooling | Sad |
| Accessory | Collar / Brooch | Santa Hat | Ribbon | Collar / Crown |
| Nearby Machine | Shooting | Claw Machine | Racing | Claw Machine |
Building The Grid By Trait
Starting with the emotional states and animal costumes provides the cleanest foundation. Several statements link how a mascot looks or acts directly to specific animal types and column arrangements, making the intersection between Performer Expression and Animal the ideal springboard.
Animal And Performer Expression Anchor The Mascots
The Bear costume immediately ties into the performer expressions. We learn that the performer inside the Bear is feeling blue, which corresponds to the Sad expression. Furthermore, this Bear prince is positioned directly next to the Drooling performer. Because the Bear prince wears a Crown alongside a Collar, and the Bear mascot sits at Mascot D, the Drooling performer must be Mascot C.
Next, we know that the Bored performer is working as the Fox. That pairs Boredom directly with the Fox suit. That leaves two animals and two expressions unaccounted for: Panda and Rabbit, alongside Tired and Drooling. Mascot C is already established as Drooling, which leaves the Rabbit costume for Mascot C. Consequently, the Bored Fox and the Tired performer must take up the remaining spaces.
Another clue mentions that Kate lost sleep because her child threw a tantrum, explaining why Kate is Tired. Since Mascot C is Drooling and Mascot D is Sad, Mascot A and Mascot B must host Tired and Bored. The Bored Fox performer is not Betty, and the Panda is not located to the right of Diana. Placing Panda at Mascot A and Fox at Mascot B naturally fulfills the column structure. Mascot A becomes the Tired Panda, Mascot B becomes the Bored Fox, Mascot C becomes the Drooling Rabbit, and Mascot D stands as the Sad Bear.
Performer Names Connect To Their Emotional States
With the expressions assigned to all four columns, linking the performers to their positions becomes straightforward. We already know that Kate was kept awake, giving her the Tired expression at Mascot A.
For the remaining three names, Diana, Ray, and Betty, clue restrictions sort them quickly. The performer who feels Bored working as the Fox cannot be Betty. That leaves Diana or Ray for Mascot B. However, Ray is explicitly not stationed near the Claw Machines. Since both Mascot B and Mascot D have Claw Machines nearby, Ray cannot be at Mascot B or Mascot D. This places Ray squarely at Mascot C as the Drooling Rabbit.
With Kate at Mascot A and Ray at Mascot C, only Mascot B and Mascot D remain open for Diana and Betty. Because the Bored Fox at Mascot B cannot be Betty, Diana must take Mascot B. That leaves Betty to perform as the Sad Bear at Mascot D. Every performer now has a designated post and costume.
Accessories Define The Outfits
The Accessory row fills out next using specific outfit restrictions linked to expressions and performer titles. One mascot wears only a Ribbon. The Drooling performer does not wear a Collar, which rules out the double accessories that feature Collars. Since Mascot C is Drooling, Mascot C wears only the Ribbon.
The remaining accessories are Collar / Brooch, Santa Hat, and Collar / Crown. We know from earlier context that Mascot D is the Bear prince. A prince carries a Crown, meaning Mascot D is equipped with Collar / Crown.
That leaves Collar / Brooch and the Santa Hat for Mascot A and Mascot B. Mascot A, the Panda, takes Collar / Brooch, while Mascot B, the Fox, wears the Santa Hat. This distributes all wearable items across the four slots without conflicting with any costume rules.
Nearby Machines Complete The Floor Plan
The final row requires distributing the arcade attractions: Shooting, Racing, and two Claw Machines.
We learn that the game making someone a good hitman is not in the right half of the layout. The hitman game refers to the Shooting game. The right half consists of Mascot C and Mascot D, so the Shooting game must sit on the left half, belonging to either Mascot A or Mascot B.
At the same time, Ray is not located near the Claw Machines. Ray is positioned at Mascot C. Since Mascot C cannot have a Claw Machine, and the Shooting game belongs to the left half, Mascot C must be stationed beside the Racing game.
With Mascot C taking the Racing game, the two Claw Machines must fill two of the remaining positions. Knowing that the Shooting game occupies the left half, Mascot A takes the Shooting game, leaving Mascot B and Mascot D to take the two Claw Machines. Every arcade machine now sits by its respective mascot.
Where The Trait Rows Intersect
Expressions Bridge Costume Types And Column Order
The interaction between Performer Expression and Animal shows how one descriptive clue can resolve multiple columns simultaneously. Hearing that the Bear performer feels blue ties Sadness directly to the Bear. Noting that the Bear prince stands next to the Drooling performer links Mascot D and Mascot C together. This adjacency immediately sorts Mascot C as the Drooling Rabbit and Mascot D as the Sad Bear, providing the anchor needed to place Fox and Panda in the earlier columns.
Sleep Deprivation And Physical Placement Sort The Performers
Kate's backstory explains her Tired state, which ties her name directly to an expression rather than an animal or an accessory. Because the other expressions were already pinned down to specific columns, identifying Kate as Tired places her straight into Mascot A. That single match eliminates one slot from the candidate pool for Diana, Ray, and Betty, allowing the negative clues about Claw Machines and Betty's costume to resolve the remaining cast in rapid succession.
Machine Rules Isolate The Central Mascot
The arcade game clues cross inspect Performer, Animal, and Nearby Machine at once. Ray's position as the Drooling Rabbit at Mascot C prevented him from being anywhere near a Claw Machine. When combined with the rule keeping the hitman Shooting game out of the right half, Mascot C was completely blocked from taking Shooting or Claw Machines. This forced Mascot C to take Racing, leaving the Claw Machines to fall neatly into Mascot B and Mascot D.
Final Grid Check
Every row now cleanly validates against the clues. Mascot A features Kate as the Tired Panda with a Collar and Brooch next to the Shooting game. Mascot B holds Diana as the Bored Fox wearing a Santa Hat by a Claw Machine. Mascot C contains Ray as the Drooling Rabbit wearing a Ribbon beside the Racing game. Mascot D houses Betty as the Sad Bear wearing a Collar and Crown next to another Claw Machine. Each trait aligns seamlessly across every column, leaving no contradictions in the arcade floor plan.
Comments