
Profile Perfect Level 358 Answer
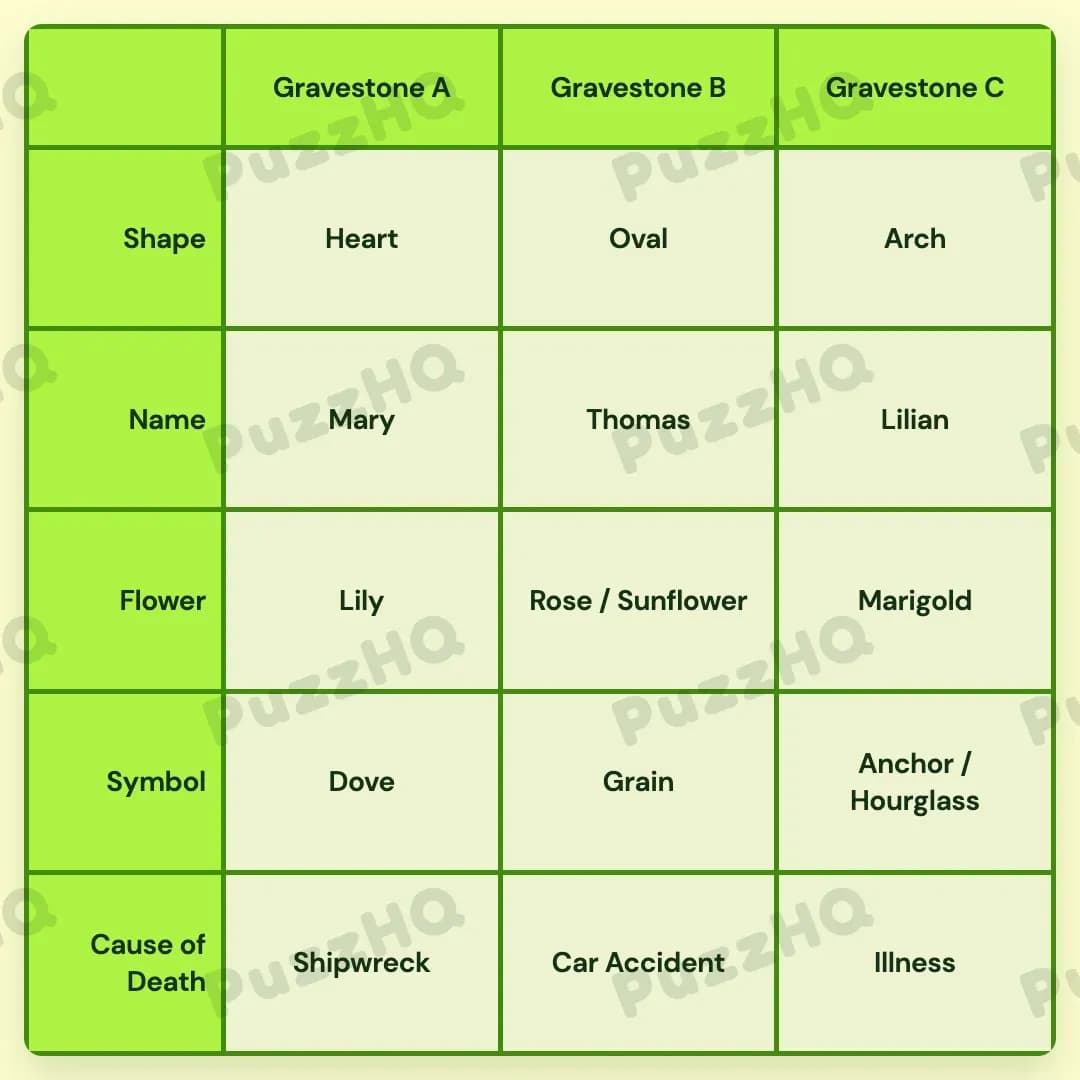
Here is the complete solution for each gravestone across the cemetery grounds.
| Trait | Gravestone A | Gravestone B | Gravestone C |
|---|---|---|---|
| Shape | Heart | Oval | Arch |
| Name | Mary | Thomas | Lilian |
| Flower | Lily | Rose / Sunflower | Marigold |
| Symbol | Dove | Grain | Anchor / Hourglass |
| Cause of Death | Shipwreck | Car Accident | Illness |
How I Solved Profile Perfect Level 358
Looking at the board initially, the clearest way in was to establish the identity and placement of the central plot. The middle spot had two direct clues pointing right toward it, giving an immediate foundation for the rest of the layout.
The Middle Grave Gave Me A Direct Starting Point
The first thing I noticed was the mention of someone dying while passing through the circuit in the middle spot. That clearly established Gravestone B as belonging to a racer whose cause of death was a car accident.
Right alongside that, another clue told me that the Dove symbol had to be located to the left of the grave of a male racer. Because the racer was in the middle at Gravestone B, the only plot to the left was Gravestone A. That meant Gravestone A carried the Dove symbol, and Gravestone B was the male racer named Thomas.
With Thomas occupying the middle spot and a clue directly placing Lilian at Gravestone C, Mary had to be the name on Gravestone A by simple elimination. In just a couple of moves, the names across all three plots were completely locked down.
Connecting Symbols And Gravestone Shapes
Once Gravestone A was confirmed to have the Dove symbol, I looked at the spacing clue regarding symbols. The Dove and the time symbols could not be neighbors. Since Gravestone A held the Dove, Gravestone B could not hold any time symbol. That meant the time symbol, Hourglass, had to be over on Gravestone C alongside the Anchor.
That left only one open symbol slot for Gravestone B, which had to be Grain.
From there, the clue connecting symbols to shapes came into play. The Grain gravestone was described as closely resembling the shape of a wheat seed. That gave Gravestone B the Oval shape.
Flowers And Causes Of Death Fell Into Line
With Gravestone B established as Oval, I turned to the remaining shape and flower clues. One clue stated that Lily flowers were placed on top of the Heart gravestone. Because Gravestone B was already Oval, Lily and Heart had to pair up either on Gravestone A or Gravestone C.
We also knew that thorny flowers were placed on Gravestone B, which gave that middle plot Rose / Sunflower. Meanwhile, Lilian over on Gravestone C was not fond of Sunflowers, confirming her floral tribute had to be Marigold. That left Lily for Gravestone A.
Since Lily belonged on Gravestone A, Gravestone A also took the Heart shape according to the clue pairing them together. Gravestone C then took the final remaining shape, which was Arch.
Finishing With The Final Causes Of Death
At this point, only the causes of death for Gravestone A and Gravestone C remained unsettled.
The clue stating that an Anchor symbol honors the captain who died of cancer made this straightforward. Because the Anchor / Hourglass combination was located on Gravestone C, the illness cause of death belonged to Gravestone C.
That left Shipwreck as the only remaining cause of death, which neatly slotted into Gravestone A. With that final placement, the entire grid was complete.
The Point Where I Nearly Went Wrong
The most deceptive part of the puzzle involved the multiple symbols and flowers attached to individual plots. Gravestone C carried both Anchor and Hourglass, while Gravestone B had both Rose and Sunflower.
When reading that the Dove and time symbols could not be neighbors, it was easy to wonder whether Grain or Anchor represented time. Recognizing that an Hourglass was the time symbol helped me realize that Gravestone C had to hold that slot to stay away from the Dove at Gravestone A. Keeping track of dual traits on a single gravestone made sure no clues were misapplied.
Looking Back At The Solution
Pinning down the racer at Gravestone B right at the beginning proved to be the pivotal breakthrough. Once the middle column had its cause of death and name secured, placing the Dove to the left set up an unbroken chain of eliminations across the symbols and shapes.
Comments