
Profile Perfect Level 596 Answer
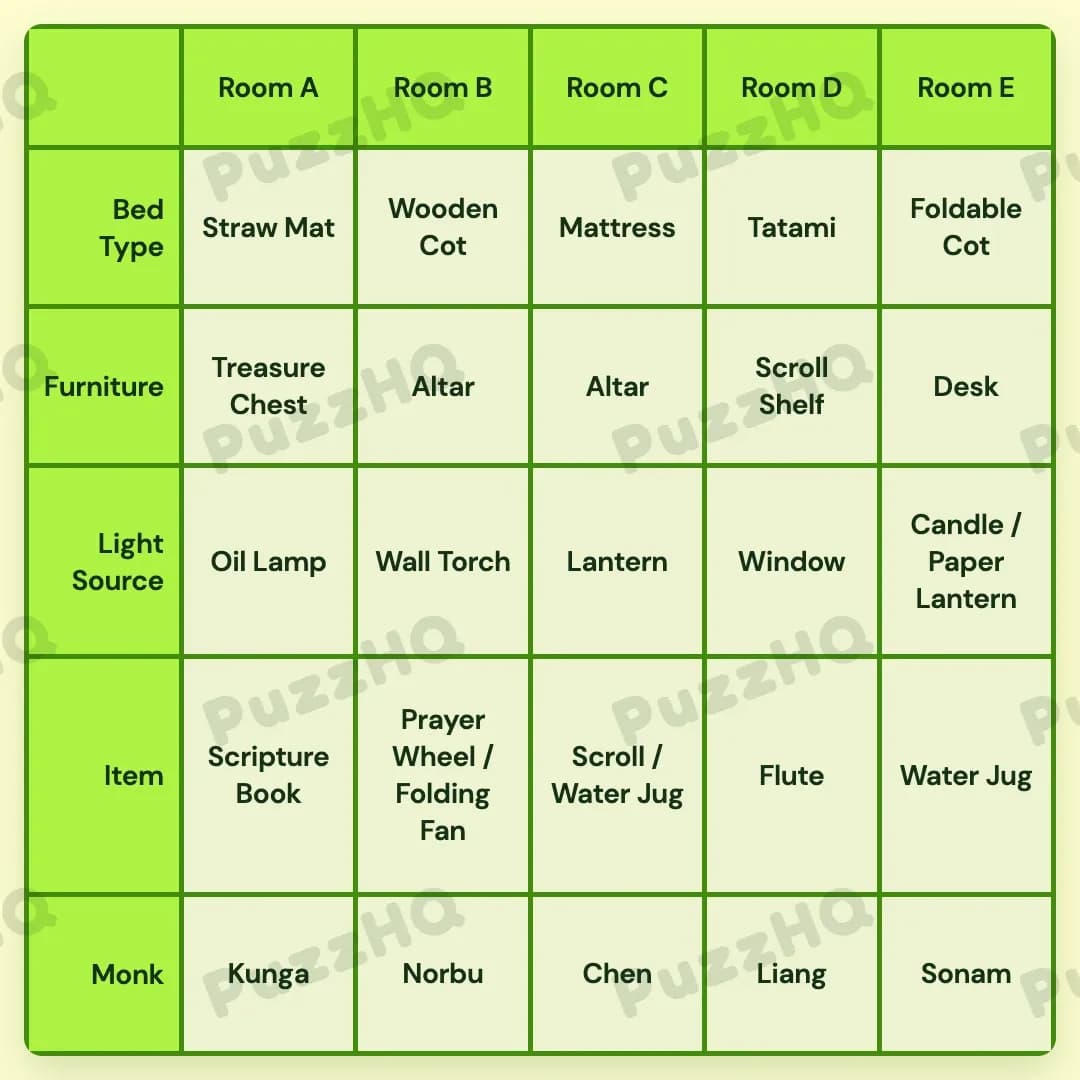
Before you review your notes, take a look at the fully restored monastery floor plan below.
| Trait | Room A | Room B | Room C | Room D | Room E |
|---|---|---|---|---|---|
| Bed Type | Straw Mat | Wooden Cot | Mattress | Tatami | Foldable Cot |
| Furniture | Treasure Chest | Altar | Altar | Scroll Shelf | Desk |
| Light Source | Oil Lamp | Wall Torch | Lantern | Window | Candle / Paper Lantern |
| Item | Scripture Book | Prayer Wheel / Folding Fan | Scroll / Water Jug | Flute | Water Jug |
| Monk | Kunga | Norbu | Chen | Liang | Sonam |
The Logic Behind Profile Perfect Level 596
The structural backbone of this puzzle is column geometry. Rather than handing out direct matches between monks and their belongings, the challenge forces you to treat the monastery as an interconnected hallway where fixed intervals, neighbor relationships, and sightlines anchor the layout. Once the lateral distances establish where the key figures reside, the rest of the monastery settles into order with quiet consistency.
Anchoring The Quarters Through Distance
The earliest breakthrough comes from matching cultural details to exact column measurements. We learn that Liang sleeps on traditional Japanese flooring, which designates Tatami as his sleeping surface. Right alongside this detail is a spatial gap: the Oil Lamp sits exactly three columns away from Liang.
Across a five room corridor numbered Room A through Room E, an interval of three columns can only span between the first room and the fourth, or between the second room and the fifth. Because Tatami must belong to Liang, placing him in Room B would push the Oil Lamp to Room E, while placing him in Room D pushes the Oil Lamp all the way back to Room A.
Observing the leftmost room provides the necessary clarity. The monk in Room A has tonsured his head in devotion, establishing an ascetic routine at the very start of the hall. Meanwhile, we know the Scripture Book is studied on a Mat because a desk is unavailable, which immediately pairs the Straw Mat with Room A. With the Straw Mat claiming Room A and Liang resting on Tatami, Liang cannot occupy the early part of the hall. He belongs in Room D, which immediately locks the Oil Lamp into Room A.
Tracing The Flames Down The Corridor
With Room A and Room D established, the lighting arrangements become the driving force of the solve. We are told that the only room without fire sits directly beside the Candle. Looking at the options for illumination, a daylight opening such as a Window represents the sole light source that does not involve an open flame.
Room D, already assigned to Liang, takes the Window as its light source. Because the room without fire must sit adjacent to the Candle, the Candle must occupy an adjoining room. If it were placed in Room C, it would run headlong into restrictions regarding neighboring festival lanterns and shelf placements. Setting the Candle in Room E satisfies the adjacency without crowding the center of the hall, which leaves Room C to hold the Lantern and Room B to take the Wall Torch.
This arrangement also clarifies where the furnishings go. A Scroll Shelf can only exist in the room directly beside the Lantern. With the Lantern hanging in Room C, the shelf could theoretically sit in Room B or Room D. However, Room B is already slated to receive an altar alongside Room C, because altars are supplied exclusively to rooms featuring a Wooden Cot and a Mattress. That leaves Room D as the sole valid home for the Scroll Shelf.
Sound and silence fill in the resident monks. The musical instrument, identified as the Flute, must appear in Room B or Room D. Its neighboring room is said to have a festival light hanging on its wall, pointing toward the Lantern in Room C. Furthermore, Norbu cannot hear the instrument being played. Placing the Flute in Room D keeps it next to Room C while allowing Norbu to occupy Room B, comfortably isolated from the melody. Liang remains in Room D, listening to his own instrument, while Sonam sits in Room E practicing meditation at his Desk.
Fitting The Altars And Daily Study Into Place
With the monks and primary furniture assigned to their respective chambers, the remaining quarters depend on practical routines. Sonam meditates in Room E before the Desk, meaning Room E takes the Foldable Cot to complete the bedding category. Room A, lacking a desk, leaves Kunga to recite his texts from the Straw Mat with his Scripture Book in hand.
That leaves Room B and Room C to divide the Wooden Cot and the Mattress. A Wall Torch is used specifically in the room next to the Mattress. Since Room B burns the Wall Torch, Room C must be the room housing the Mattress. By direct pairing, Room B receives the Wooden Cot. Both of these central rooms receive the dual Altars promised by their respective bed choices, while Room A receives the Treasure Chest by elimination.
Finally, the portable possessions fall into their natural slots. We learn that the mani-lag-khor, or prayer wheel, cannot sit in Room A or Room C. Since Room D holds the Flute and Room E holds the common Water Jug shared with Room C under the Lantern and Candle, the prayer wheel must reside in Room B with Norbu. The Scroll finds its home in Room C, precisely two columns away from the foldable beds in the outer wings. Chen claims Room C by simple elimination, completing a calm, balanced monastery.
The Clue I Would Read Twice
The instruction stating that the two foldable beds are two columns away from the Scroll is easily the most delicate piece of phrasing in the puzzle.
At first glance, a solver might hunt through the traits looking for two separate portable cots, wondering if a translation error crept into the list. In practice, the clue functions as an architectural caliper. The Scroll sits in Room C, the exact center of the building. Counting two columns to the left lands on Room A, while counting two columns to the right lands on Room E.
The clue does not ask you to find two identical items. Instead, it informs you that both Room A and Room E share a collapsible nature in their bedding, framing the central study room like two matching bookends. Missing that symmetry makes the center of the grid far more difficult to stabilize.
Final Thoughts
What makes 596 memorable is how naturally it evokes quiet monastic discipline through spatial logic. Nothing feels arbitrary when proximity dictates light and sound so cleanly. You can almost feel the temperature drop as you move from the torchlit cells of the inner chambers toward the drafty window in Room D, leaving each monk in his rightful place of study.
Comments