
Profile Perfect Level 197 Answer
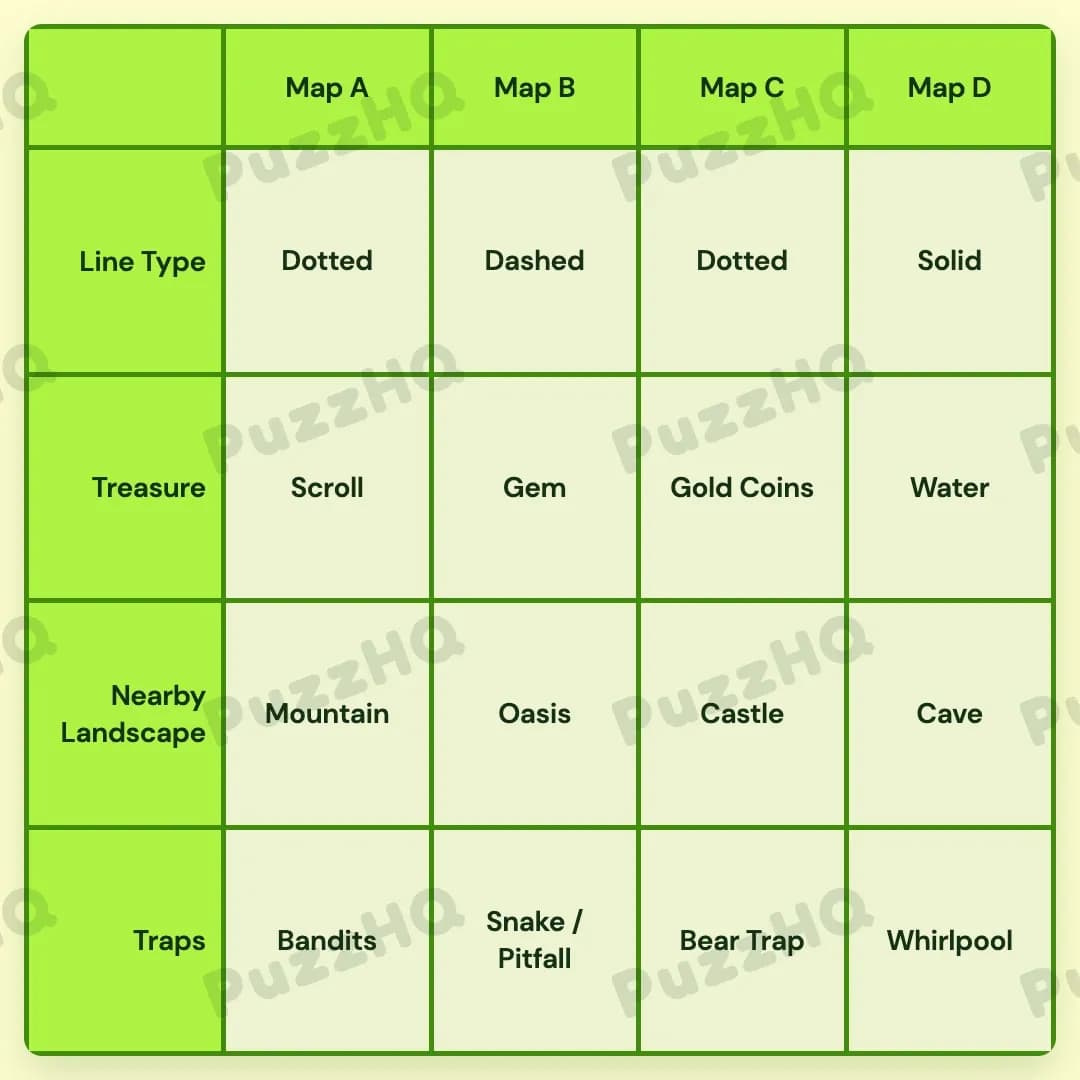
Here is the complete solution for all four maps across every category.
| Trait | Map A | Map B | Map C | Map D |
|---|---|---|---|---|
| Line Type | Dotted | Dashed | Dotted | Solid |
| Treasure | Scroll | Gem | Gold Coins | Water |
| Nearby Landscape | Mountain | Oasis | Castle | Cave |
| Traps | Bandits | Snake / Pitfall | Bear Trap | Whirlpool |
How I Solved Profile Perfect Level 197
Looking at the initial setup, the maps clearly formed a horizontal sequence from Map A on the far left to Map D on the far right. Several clues relied on spatial language like neighbors, being between other maps, and left or right orientation. The first thing I noticed was that two clues gave direct, unshakeable anchors for the outer maps, which opened up the rest of the board.
Establishing The Line Types Across The Board
I started with the clues that immediately pinned down traits to specific map letters. Clue 4 straightforwardly states that Map A has the Scroll treasure. At the same time, Clue 11 notes that Map D's path can be drawn in a single continuous line, which clearly defines Map D's line type as Solid.
From there, Clue 2 proved to be the major breakthrough for line types. It states that a living trap sits between maps with Dotted lines. Since Map D is already Solid, the only position in the four map lineup that can sit between two other maps is Map B, flanked by Map A and Map C. This immediately told me that Map A and Map C both feature Dotted lines, while the living trap belongs on Map B. With three line types locked in, Map B took the remaining line type, Dashed.
Once the Dotted maps were identified as Map A and Map C, Clue 3 became instantly usable. It mentions that the Dotted map on the right is near an abandoned Castle. Between Map A and Map C, the one on the right is Map C, giving Map C the Castle landscape.
Placing The Traps And Neighboring Landscapes
With Map D confirmed as Solid and Map C confirmed as Dotted, Clue 9 helped lock down the next trap. It tells us that the Bear Trap is next to the Solid line map. Since Map D is the Solid map, its only immediate neighbor is Map C. Map C therefore received the Bear Trap.
That placement immediately made Clue 10 practical. The clue states that the maps with the Mountain and the Bear Trap are not neighbors. Map C holds the Bear Trap, meaning its neighbors, Map B and Map D, cannot have the Mountain. Map C itself is already paired with the Castle. That left Map A as the only possible location for the Mountain.
Next, I looked at the traps on the board. Clue 2 had already confirmed that the living trap belongs to Map B, which matches the Snake / Pitfall entry. Clue 7 notes that the Whirlpool neither accompanies the Snake nor neighbors it. Because Map B holds the Snake, the Whirlpool could not be on Map B, nor could it be on its immediate neighbors, Map A or Map C. The only spot left for the Whirlpool was Map D.
With the Whirlpool assigned to Map D, Clue 5 easily resolved the remaining trap slot. It says Bandits are expected on either Map A or Map D. Since Map D was already taken by the Whirlpool, Bandits went to Map A. Every single trap slot was now completely resolved.
Locking In The Liquid Treasure And Remaining Landscapes
With the traps and line types fully settled, I turned to the treasures and landscapes. Clue 1 pairs the Water treasure directly with the Cave landscape, meaning they must occupy the exact same map column.
Clue 8 adds that the liquid treasure, which is Water, is next to a map with a Dotted line. The Dotted maps are Map A and Map C. Map D sits right next to Map C and still had both its treasure and landscape slots completely open. Placing Water and Cave into Map D satisfied both Clue 1 and Clue 8 perfectly.
That left only one open landscape slot across the entire grid: Map B. With Mountain on Map A, Castle on Map C, and Cave on Map D, Map B took the remaining landscape, Oasis.
Finalizing The Remaining Treasures
At this stage, only two treasures remained unassigned: Gem and Gold Coins, distributed between Map B and Map C.
Clue 6 mentions that the Snake's treasure is often turned into an accessory. Since Map B has the Snake / Pitfall trap, its associated treasure had to be the Gem.
That left Gold Coins as the only remaining treasure, which neatly slotted into Map C alongside its Castle and Bear Trap. With that final placement, all four maps were completely and accurately filled.
The Point Where I Nearly Went Wrong
The most deceptive part of this puzzle involves Clue 8, which mentions that the liquid treasure is next to a map with a Dotted line. Because there are two maps with Dotted lines (Map A and Map C), it is easy to assume early on that the liquid treasure could sit on Map B, which is sandwiched right between both Dotted maps.
However, Map B cannot hold the liquid treasure because Clue 1 binds Water directly to the Cave. Since Clue 10 forced the Mountain onto Map A and Clue 3 locked the Castle onto Map C, placing the Cave and Water on Map B would conflict with the accessory treasure clue for the Snake on Map B. Recognizing that Map D also neighbors a Dotted map (Map C) cleared up the ambiguity and kept the solution on track.
Looking Back At The Solution
The pivotal deduction in this puzzle was recognizing that the living trap between Dotted lines had to be Map B. Fixing the Dotted line types to Map A and Map C simultaneously resolved the spatial clues for the Castle, the Bear Trap, and the Whirlpool, allowing the entire grid to fall into place cleanly.
Comments