
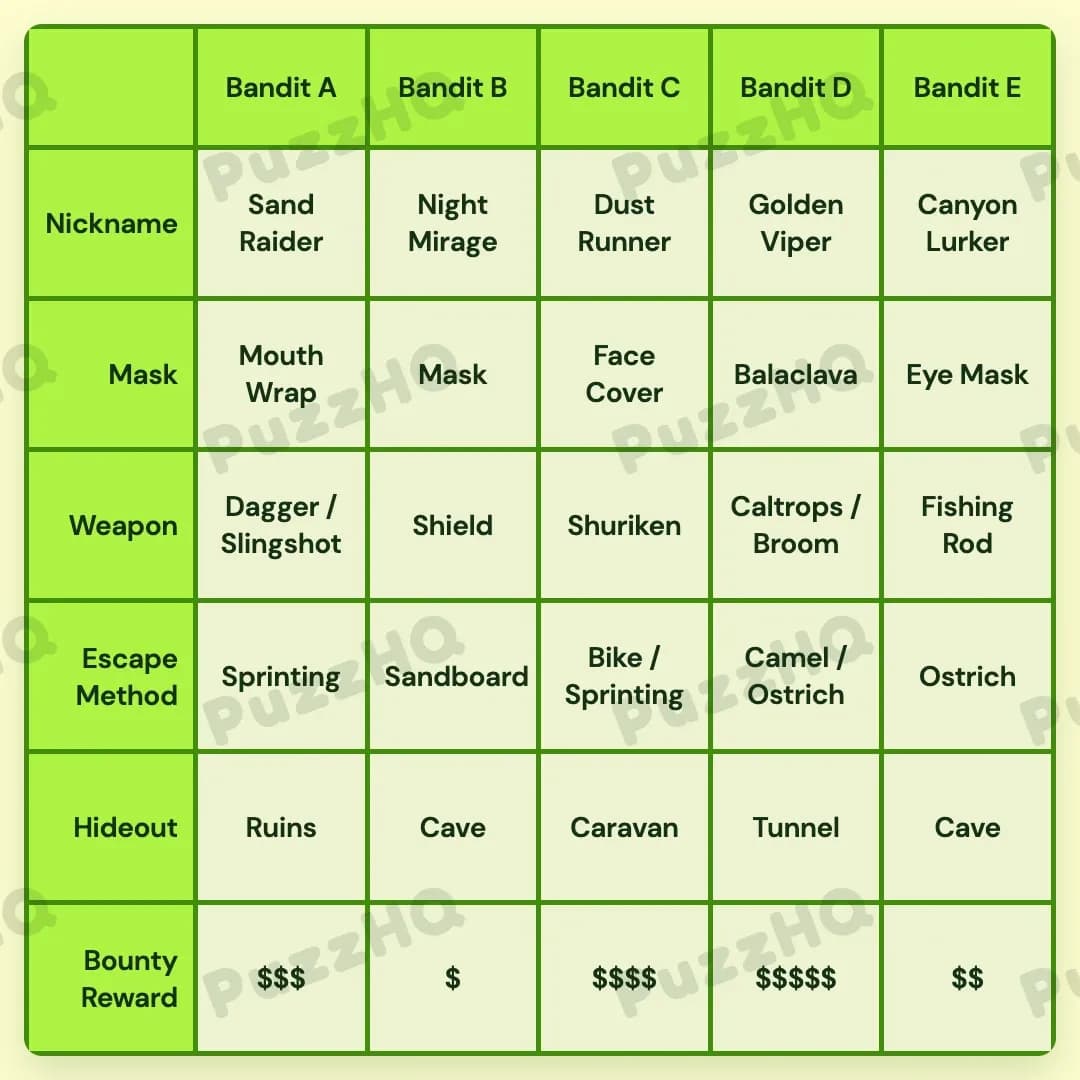
The five desert outlaws can be fully identified once their spatial clues, disguise styles, and hideout locations are pieced together.
| Trait | Bandit A | Bandit B | Bandit C | Bandit D | Bandit E |
|---|---|---|---|---|---|
| Nickname | Sand Raider | Night Mirage | Dust Runner | Golden Viper | Canyon Lurker |
| Mask | Mouth Wrap | Mask | Face Cover | Balaclava | Eye Mask |
| Weapon | Dagger / Slingshot | Shield | Shuriken | Caltrops / Broom | Fishing Rod |
| Escape Method | Sprinting | Sandboard | Bike / Sprinting | Camel / Ostrich | Ostrich |
| Hideout | Ruins | Cave | Caravan | Tunnel | Cave |
| Bounty Reward | $$$ | $ | $$$$ | $$$$$ | $$ |
Building The Grid By Trait
Starting with the spatial spacing between masks and defensive equipment provides the firmest baseline. From there, hideout geography and bounty tiers reveal where each outlaw operates across the five columns.
Masks And Weapons Establish Spatial Boundaries
The physical column spacing between items offers an immediate structural anchor. A defensive weapon sits exactly three columns away from the Eye Mask. Since the only available defensive weapon is the Shield, placing the Eye Mask on Bandit E in the fifth column forces the Shield onto Bandit B in the second column.
With the Eye Mask assigned to Bandit E, the other disguise clues quickly fall into place. Night Mirage uses a hacker's mask, claiming the standard Mask item for Bandit B. Three masks designed to cover the lower face (the Mouth Wrap, Face Cover, and Balaclava) form a contiguous group across the remaining slots. The Balaclava goes to Bandit D, while the Mouth Wrap and Face Cover fill the remaining slots for Bandit A and Bandit C.
The weapons row rapidly resolves around these disguise anchors. Bandit E is known as the Canyon Lurker, who carries the longest weapon: the Fishing Rod. Bandit A excels in close-quarters combat and crumbling hideout structures, securing the Dagger and Slingshot. The clue stating that either a Broom or Slingshot must sit next to the Fishing Rod places the Broom and Caltrops on Bandit D. Finally, Bandit C takes the Shuriken, completing the arsenal.
Hideouts And Nicknames Anchor Individual Identities
Hideout clues set strict boundaries across the columns. The bandit in the Tunnel has the highest bounty, while the bandit living in the Ruins cannot be positioned adjacent to the Tunnel. Because Bandit D holds the Tunnel, Bandit A takes the Ruins to keep them separated by intermediate columns.
Mobility clues tie the hideout category directly into nicknames. Bandit C is a multi-discipline athlete with a mobile hideout, which confirms the Caravan location. Riding a bike and kicking up dust gives Bandit C the title of Dust Runner.
Bandit D is the cunning Golden Viper who maintains complex escape routes through the underground Tunnel. Bandit B operates under the cover of darkness as Night Mirage inside a Cave, leaving Bandit E as the Canyon Lurker residing in the second Cave hideout. With four nicknames locked, Bandit A claims the remaining title of Sand Raider.
Bounty Rewards And Escape Methods Complete The Grid
Bounties are organized by experience and hideout safety. The seasoned Tunnel dweller, Golden Viper at Bandit D, commands the maximum reward of five dollar signs. Bandit B in the Cave is a rookie earning the base single dollar sign reward. Because the neighbors of Night Mirage cannot possess the maximum bounty, Bandit D cannot be adjacent to Bandit B, perfectly aligning with Bandit C sitting between them.
Bandit E carries a bounty of two dollar signs, sitting just below the three dollar signs awarded for the dagger-wielding Bandit A. This leaves the four dollar sign bounty for Bandit C.
Escape methods finalize the profile. Golden Viper utilizes multiple options including a Camel and an Ostrich. Night Mirage avoids ostriches entirely due to his nocturnal habits, relying instead on a Sandboard. Bandit E takes an Ostrich, while Bandit A relies on raw Sprinting speed. Bandit C combines Sprinting with a Bike to match her triathlon training, resolving the entire roster.
Where The Trait Rows Intersect
Defensive Gear Points Directly To The Eye Mask
The spacing requirement between the defensive item and the Eye Mask serves as the master key for the grid layout. Identifying the Shield as the sole defensive option requires a four-column span (a gap of three columns). Placing Bandit B with the Shield and Bandit E with the Eye Mask instantly sets the boundaries for both the mask and weapon rows. It also prevents the hacker mask from drifting into outer positions, locking Night Mirage directly into the second column.
The Mobile Hideout Blends Movement With Marksmanship
Bandit C represents a major intersection among weapons, hideouts, and escape techniques. The clue linking a Shuriken user to a mobile hideout directly pairs the weapon row with the Caravan. Connecting this mobile base to triathlon training and bike dust locks in the nickname Dust Runner and the dual escape method of Bike and Sprinting. Solving this single nexus resolves four distinct trait categories simultaneously for column three.
Bounty Rankings Anchor The Hideouts
The economic hierarchy directly validates hideout assignments. By linking the rookie rate of one dollar sign to the Cave and the top tier five dollar sign bounty to the Tunnel, the puzzle bridges hideout geography with reward values. Factoring in the rule that Night Mirage cannot sit next to the maximum payout prevents the Tunnel from occupying column one or three, fixing Bandit D firmly in column four with the Balaclava.
Final Grid Check
Each category locks into the next without friction. The weapon placements align with physical reach and combat styles, the mask categories respect lower-face coverage groupings, and the escape methods reflect both the hideout terrain and individual athlete profiles. Every bounty corresponds to the outlaw's experience level, confirming a fully consistent logic grid across all five columns.
Comments