
Profile Perfect Level 225 Answer
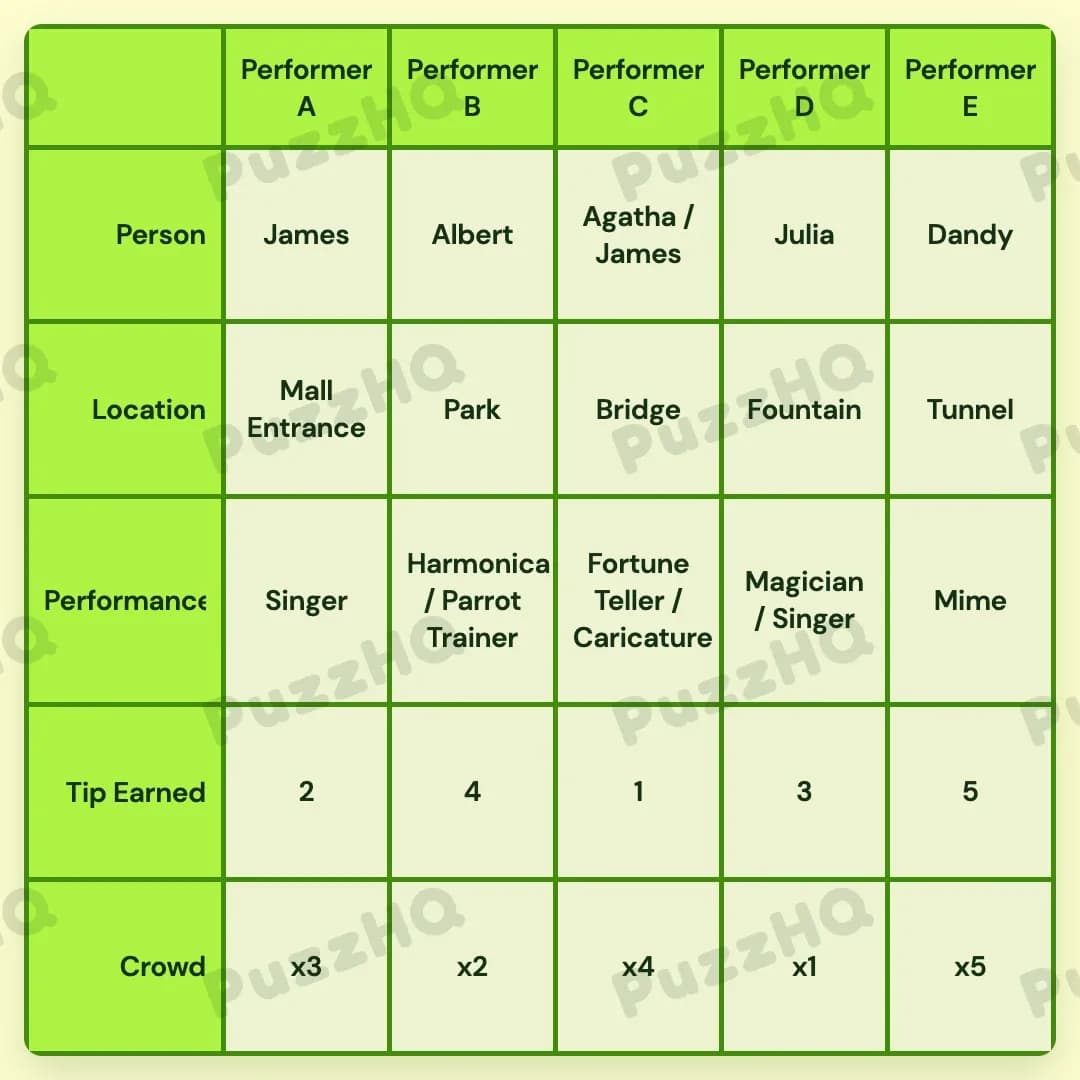
Here is the complete solution for all five street performers across every category.
| Trait | Performer A | Performer B | Performer C | Performer D | Performer E |
|---|---|---|---|---|---|
| Person | James | Albert | Agatha / James | Julia | Dandy |
| Location | Mall Entrance | Park | Bridge | Fountain | Tunnel |
| Performance | Singer | Harmonica / Parrot Trainer | Fortune Teller / Caricature | Magician / Singer | Mime |
| Tip Earned | 2 | 4 | 1 | 3 | 5 |
| Crowd | x3 | x2 | x4 | x1 | x5 |
How I Solved Profile Perfect Level 225
The first thing I noticed was how clearly the crowd sizes and spatial clues could lock down the layout from left to right. Once the locations and audience counts were anchored across the columns, the tips and shared performer acts sorted themselves out in a steady sequence.
Establishing The Locations And The Magician
I began by scanning the location clues. We learn that there are four performances separating the Mall Entrance from the opposite end, which immediately places the Mall Entrance in Performer A's column and pushes the remaining endpoint to Performer E.
Next, the clue mentioning that the Magician is a neighbor of both the Bridge and Tunnel performers gave me an immediate structure for the right side of the board. The only way a performer can sit directly between the Bridge and the Tunnel is if that performer is at Performer D, with the Bridge at Performer C and the Tunnel at Performer E.
With Mall Entrance at A, Bridge at C, and Tunnel at E, the remaining two spots were Performer B and Performer D. Since Performer D is the Magician neighboring the Bridge and Tunnel, Performer D took the Fountain, leaving the Park at Performer B.
Sorting Out Crowd Sizes Across The Board
With the locations set, I looked at the crowd clues. Performer A had a larger crowd than Performer D, but fewer people than both Performer C and Performer E. Meanwhile, more people showed up at the Tunnel than at the Bridge, which meant Tunnel (Performer E) had to be larger than Bridge (Performer C).
We also knew that Albert had very few viewers, but not the least. Since Performer D had the lowest count of all, Performer D took the x1 crowd rating. That left Albert with the x2 crowd rating at Performer B. Following the chain of comparisons upward, Performer A received x3, the Bridge at Performer C received x4, and the Tunnel at Performer E took the largest crowd rating of x5.
Figuring Out Tips And Albert's Position
Once Albert was placed at Performer B in the Park with a crowd of x2, his tip clue became usable. Albert was glad to receive a tip twice the amount of the performer to his left. Performer B's location in the Park also earned the second biggest tip overall, which meant Albert earned 4.
Because Albert earned twice the amount of Performer A on his left, Performer A's tip had to be 2.
Next, the Fortune Teller received the least tip, giving that act a value of 1. Because the Fortune Teller is not inside the Tunnel and sits at a location with the lowest tip, Performer C took the tip value of 1 and the Fortune Teller act. That left tips of 3 and 5. With Performer B at 4 and Performer C at 1, the largest remaining tip of 5 went to Performer E, leaving a tip of 3 for Performer D.
Placing Names And Shared Acts
With tips and locations locked in, I shifted focus to the performers themselves. The clue stating that melodies come out of Julia's mouth while she is doing tricks paired singing and magic together for Julia. Since the Magician was already established at Performer D, Julia became the artist at Performer D, performing Magician / Singer.
We also knew that the female performers were located exactly one column apart. With Julia at Performer D, the other female performer had to be at Performer C. The clue noting that Agatha runs her show in a pair pointed straight to Performer C. Because James performs at two different locations daily, James joined Agatha at Performer C as Agatha / James, while also occupying the solo slot at Performer A.
That left Performer E for Dandy, completing the roster of names.
Resolving The Final Acts
The last few performance slots fell into place quickly. Performer E conveys stories through gestures and expressions, which meant Dandy at Performer E was the Mime.
For Performer C, Agatha and James were already known to include the Fortune Teller act. The clue stating that the performer working with the animal is to the left of the painter meant the Parrot Trainer had to sit to the left of the Caricature artist. That meant Performer B took Harmonica / Parrot Trainer, while Performer C took Fortune Teller / Caricature.
Finally, since James is a Singer at Performer A, the grid was fully completed.
The Point Where I Nearly Went Wrong
The trickiest part of the puzzle was keeping track of performers who appeared in multiple roles or as duos. Seeing James listed at both Performer A and Performer C could easily feel like a contradiction if you miss the clue stating that James performs at two different locations daily.
Similarly, Agatha running her act as a pair explains why Performer C contains two names rather than one. Once I realized that duo acts and multi location performers were explicitly supported by the clues, placing James and Agatha at Performer C made complete sense.
Looking Back At The Solution
The breakthrough moment came from using the Magician's neighbors to fix the Bridge, Fountain, and Tunnel onto the right half of the board. That single layout anchor unlocked both the crowd size hierarchy and Albert's tip math, turning the rest of the deduction into a straightforward series of steps.
Comments