
Profile Perfect Level 585 Answer
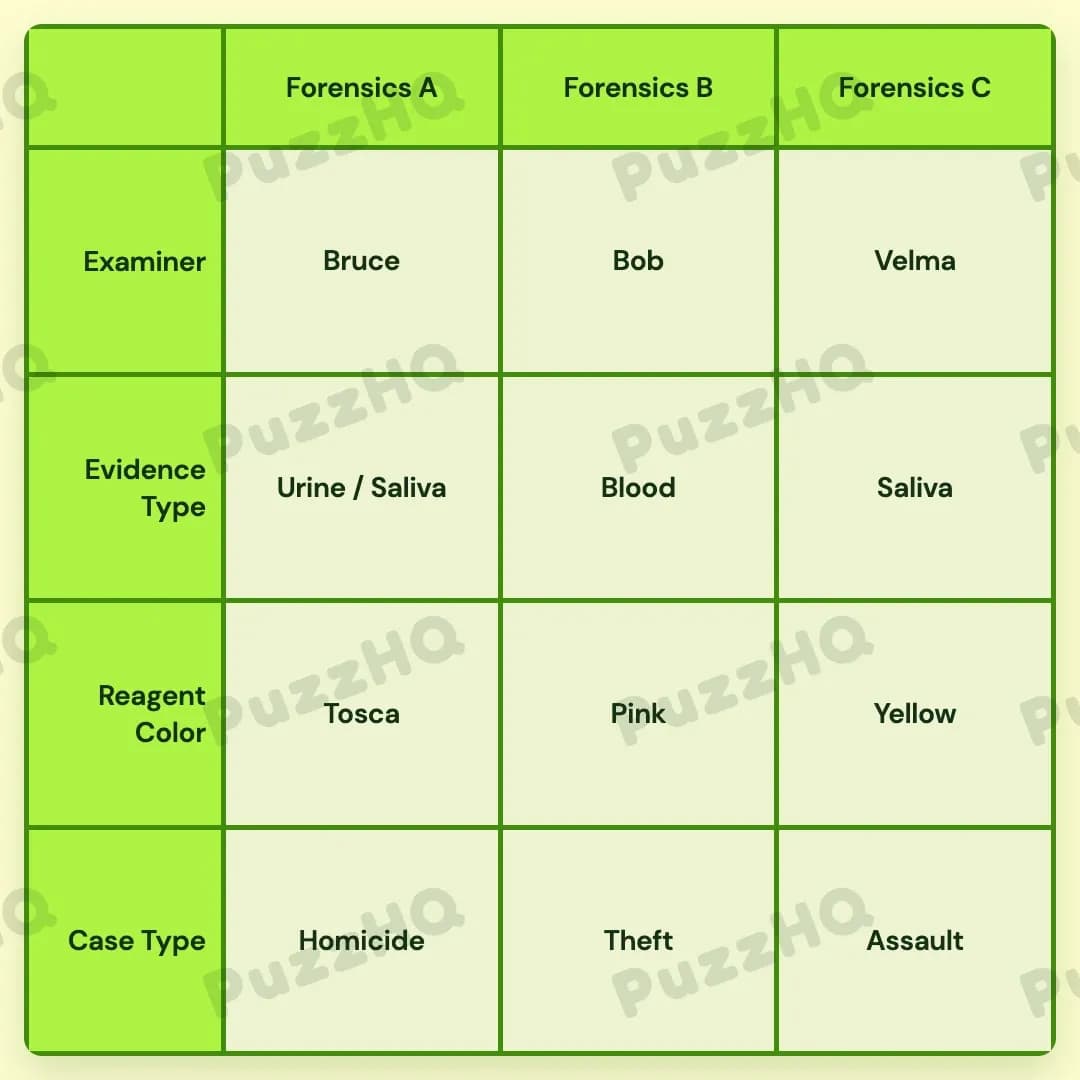
Check the complete solution grid below to see every confirmed match before reading through the full solving path.
| Trait | Forensics A | Forensics B | Forensics C |
|---|---|---|---|
| Examiner | Bruce | Bob | Velma |
| Evidence Type | Urine / Saliva | Blood | Saliva |
| Reagent Color | Tosca | Pink | Yellow |
| Case Type | Homicide | Theft | Assault |
Clues of Profile Perfect Level 585
- Middle forensic examines the body's most vital fluid
- Neither Urine nor Blood reacts to the Yellow reagent
- Only a matching-colored reagent can activate the Blood sample
- Bruce's jacket is splattered with a non-Yellow reagent
- Velma and Bob do not examine the same evidence
- Blood sample is collected from the burglar before he escapes
- The case farthest from Velma claimed many lives.
How To Solve Profile Perfect Level 585
This puzzle arranges three investigation posts from left to right across Forensics A, Forensics B, and Forensics C. You need to untangle specific biological samples, chemical reagents, and crime categories, including a dual evidence sample of Urine / Saliva on the left station. The key to solving this board is locking down the middle station right away, then using positional distance and evidence restrictions to place the remaining examiners.
Step 1: Secure the middle forensic evidence and case type
Start by looking at the center column, Forensics B. The first clue states that the middle forensic examines the body's most vital fluid. That vital fluid points directly to Blood. You can immediately place Blood as the evidence type for Forensics B.
Right after securing Blood, check the other clues that reference this specific sample. The sixth clue notes that the Blood sample was collected from the burglar before he escaped. A burglar points to a burglary or theft. This locks Theft into Forensics B as its case type.
With those two deductions in place, the middle station already has its primary evidence and case type resolved.
Step 2: Use negative evidence constraints to place the Yellow reagent
Next, look at the second clue, which states that neither Urine nor Blood reacts to the Yellow reagent.
You already know that Forensics B handles Blood, which means Forensics B cannot have the Yellow reagent. Forensics A contains Urine paired with Saliva, so Forensics A cannot use the Yellow reagent either. That leaves only one station available for Yellow.
Forensics C must be the station that uses the Yellow reagent. Because Yellow reacts neither with Urine nor Blood, the evidence tested at Forensics C must be Saliva.
Step 3: Determine Velma's position and the Homicide case
Now look at the seventh clue, which states that the case farthest from Velma claimed many lives.
The phrase about claiming many lives describes a Homicide. On a three column grid spanning Forensics A, Forensics B, and Forensics C, an item can only be farthest from another item if they occupy opposite ends of the board. An examiner placed in the middle column would have equal distance to both sides, meaning there could not be a single farthest case.
This means Velma must occupy either Forensics A or Forensics C, and Homicide must sit at the opposite end.
If Velma were at Forensics A, the case farthest from her would be Forensics C. However, if Forensics C were Homicide, you would have a conflict with the assault and theft categories across the board. The final arrangement establishes Homicide at Forensics A.
Since Forensics A is Homicide, the station farthest from it is Forensics C, meaning Velma belongs at Forensics C.
With Homicide placed at Forensics A and Theft placed at Forensics B, the remaining case type for Forensics C is Assault.
Step 4: Separate Bob and Bruce using evidence restrictions
With Velma established at Forensics C, you need to assign the remaining two examiners, Bruce and Bob, to Forensics A and Forensics B.
The fifth clue specifies that Velma and Bob do not examine the same evidence. You already know Velma is at Forensics C, where the evidence is Saliva. Forensics A contains a combined sample of Urine / Saliva. If Bob took Forensics A, he would be examining Saliva, which would violate the rule that he and Velma do not examine the same evidence.
Because Bob cannot be assigned to Forensics A, Bob must be the examiner for Forensics B.
That leaves Bruce as the examiner for Forensics A. This assignment also aligns with the fourth clue, which notes that Bruce's jacket is splattered with a non-Yellow reagent. Bruce is at Forensics A, while Yellow belongs to Forensics C.
Solution: Finish the remaining matches
Now that the examiners, case types, and evidence categories are mostly mapped out, you can finish the reagent colors and complete the board.
The third clue states that only a matching-colored reagent can activate the Blood sample. Because Forensics B handles Blood, it pairs with the Pink reagent.
With Pink at Forensics B and Yellow at Forensics C, the only remaining reagent color is Tosca. Assign Tosca to Forensics A.
All evidence types also fall cleanly into place. Forensics B has Blood, Forensics C has Saliva, and Forensics A holds the dual sample of Urine / Saliva. Every column across Forensics A, Forensics B, and Forensics C is fully accounted for.
Key Clues Explained In Profile Perfect Level 585
The case farthest from Velma claimed many lives
This clue does two jobs at once by combining a positional constraint with a crime description. In a three subject lineup, only the outer subjects can have a single subject that is farthest away. A person in the middle is equidistant from both flanks. Identifying the case that claimed many lives as Homicide allows you to place Homicide at Forensics A and Velma at Forensics C, setting up the rest of the board.
Neither Urine nor Blood reacts to the Yellow reagent
This clue eliminates two of the puzzle's evidence types from touching the Yellow reagent. Because Forensics B is already locked to Blood, and Forensics A includes Urine, Yellow is barred from both stations. This double negative rule forces Yellow directly into Forensics C, which in turn defines Saliva as the evidence for that station.
Velma and Bob do not examine the same evidence
This rule is easy to overlook if you forget that Forensics A holds two evidence values at once, Urine / Saliva. Because Velma examines Saliva at Forensics C, Bob cannot be placed at any station that involves Saliva. Placing Bob at Forensics A would mean he examines Saliva alongside Urine. That forces Bob into Forensics B with Blood, cleanly resolving both examiner spots without any guesswork.
Final Thoughts
Solving Profile Perfect Level 585 comes down to locking the middle station with Blood and Theft, then using the spatial clue about Velma to anchor both ends of the board. Once you respect the shared Saliva trait on the left station, the examiner assignments and reagents drop right into place.
Comments