
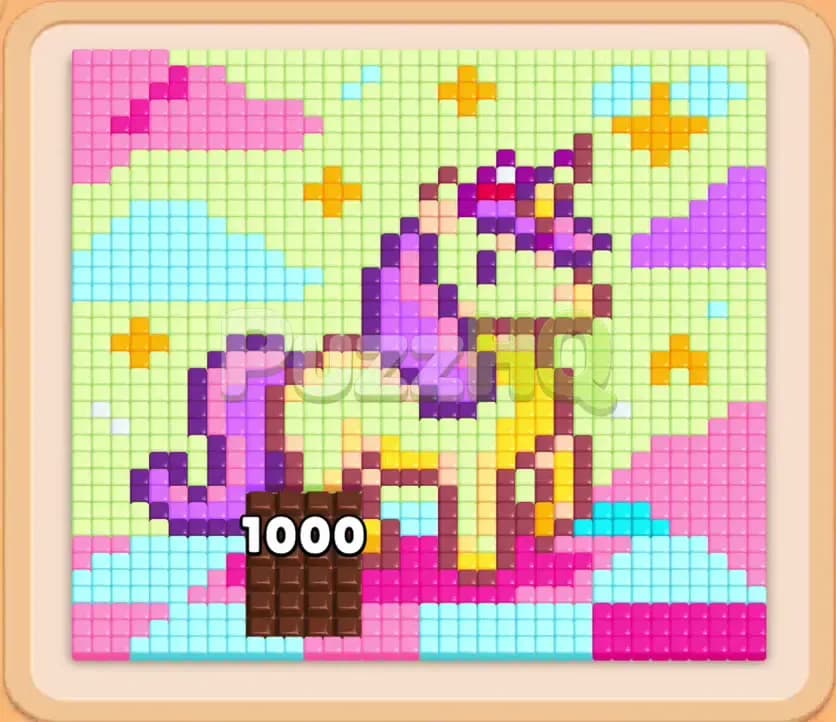
Colony Flow Level 2384 presents a vibrant pixel art challenge featuring a grand unicorn surrounded by floating clouds and gleaming stars. With a starting count of one thousand food tiles, this stage demands disciplined slot management and thoughtful path routing right from the opening tap. You will need to dismantle the lower perimeter before you can touch the unicorn itself, all while juggling locked tray columns and linked block pairs.
Colony Flow Level 2384 Board Breakdown
Starting Colors and Blocks
The pixel art canvas displays an intricate unicorn design made up of exactly one thousand food tiles. The unicorn stands at the center of the board with a bright yellow body, deep purple hooves, a rich violet mane, matching wings, and a sharp purple horn. Surrounding the mythical beast are wide layers of environment tiles. Across the bottom of the board lies a foundation of bright pink and light cyan ground. Flanking the unicorn on both sides are puffy light blue clouds and mint green sky accents, dotted with golden yellow stars.
Below the main playfield sits your tray of numbered blocks, organized into five distinct columns. At the start of the level, the top row of accessible blocks includes red, dark wine, magenta, purple, and dark brown. Beneath these initial selections rest deeper layers containing light greens, bright yellows, cyan, and additional purples. Ants emerging from the nest entrance at the bottom edge must find an open path to matching colored tiles before any block can count down.
Paths, Obstacles, and Limited Space
Your primary spatial restriction is the waiting tray, which offers only five open slots above the supply columns. Whenever you select a block from the lower stacks, it moves into one of these five slots. If an open path exists to tiles matching that block color, ants stream out of the nest and march directly to the food, rapidly decreasing the number displayed on the block. If all five slots become occupied by blocks that cannot find matching exposed food, your colony stops moving and the run ends immediately.
Two major puzzle elements dictate your route on this board. The first element is Connected Boxes. Several blocks in the tray arrive bound together by horizontal metal links. Selecting one linked block automatically pulls its partner into the waiting slots as well, consuming two spaces in a single action. The second obstacle is the Lock and Key mechanic located in the fourth column. A tall wooden barrier seals off several crucial blocks in that stack until you free the key block positioned near the base. Because the unicorn mane and wings require heavy purple clearing, unlocking that fourth column is mandatory for finishing the stage.
Colony Flow Level 2384 Complete Solution
Step 1: Clear the Lower Pink Ground
Your first priority is establishing a wide entry path for your ant colony. At the beginning of the level, the upper unicorn tiles and high clouds remain completely blocked off by the lower border of the image. The only food tiles directly accessible from the nest are the bright pink and magenta pixels lining the bottom ground.
Begin by selecting the pink and magenta blocks readily available across the top layer of your tray. As soon as these blocks reach the waiting slots, pink ants swarm out of the nest and dissolve the bottom ground layer. The total board counter quickly drops from one thousand down past nine hundred. This initial clear opens physical space along the lower edge of the board, allowing you to peek at the light blue ground tiles lying directly behind the pink layer.
Step 2: Clear Connected Boxes and Uncover Cyan Tiles
With the outer pink boundary partially cleared, you must now address the first set of Connected Boxes in your tray. A linked pair containing dark brown and yellow blocks rests near the surface. Tapping this pair moves both blocks into your waiting slots simultaneously, leaving you with fewer empty spaces to spare.
Because the yellow block can now target small exposed stars or trim while brown works on darker accents, the board count continues to decline toward seven hundred. At the same time, pick available light blue blocks to target the cyan ground tiles revealed by your first step. Clearing the cyan tiles widens the corridor directly beneath the unicorn hooves and prevents your waiting slots from clogging while the linked blocks finish their count.
Step 3: Strip Away the Hooves and Lower Foundation
Continue your advance into the lower half of the board by clearing the purple hooves and the remaining foundation. Select accessible purple and light pink blocks from the top rows of your tray. These blocks direct your ants straight into the bottom edge of the unicorn legs and the pink base of the tail.
By maintaining active food consumption on the board, your waiting slots remain clean as blocks count down to zero and vanish. The total food count drops smoothly below six hundred. As the lower legs disappear, you expose the bright yellow belly of the unicorn and establish open lanes that reach upward into the center of the canvas.
Step 4: Retrieve the Key and Open Column Four
Now that the lower ground is completely gone, shift your attention entirely to the tray layout. The tall wooden barrier over column four conceals several purple and magenta blocks that you must obtain to clear the unicorn body. Work down through the adjacent columns to access the red block that holds the key at the base of column four.
Once you clear the necessary tiles to claim the key, the wooden barrier lifts away from column four, immediately revealing a fresh stack of high value purple and violet blocks. This moment dramatically changes the board state. You no longer have to worry about running out of purple choices, and your food count pushes below four hundred and fifty.
Step 5: Dismantle the Yellow Torso and Side Clouds
With column four unlocked and multiple paths extending up through the middle of the board, you can target the main mass of the unicorn. Select the large yellow blocks from the tray to unleash a massive swarm of yellow ants. These ants march directly up through the center opening and consume the unicorn torso, neck, and face.
While the yellow blocks count down, use your remaining waiting slots to activate light green and cyan blocks. Green ants peel away the mint sky accents above the unicorn back, while blue ants clear out the large puffy clouds on the left and right borders. The food count plunges rapidly down to two hundred and thirty as huge swaths of the canvas turn completely clear.
Step 6: Consume the Purple Mane, Wings, and Tail
Only the most intricate sections of the pixel art now remain. The majestic wings, flowing purple mane, and curled tail stand isolated in the center, alongside a few scattered golden stars in the upper sky.
Select the purple and violet blocks recently uncovered in your unlocked tray columns. Ants rush into the wings and mane, systematically erasing the dark pixels from bottom to top. At this stage, take extra care when selecting connected blocks. Ensure that whenever a linked pair enters the waiting area, at least one of its colors has an open route to the remaining purple or yellow fragments. The food count falls past forty four, leaving only tiny scattered remnants across the board.
Step 7: Clear the Final Star Pixels for Victory
The final push requires precision rather than speed. Only small isolated pixels linger on the board, including the tip of the horn, single star tiles, and tiny mane accents.
Select the final small yellow, orange, and purple blocks from the tray. Because each of these colors has an unobstructed target on the nearly empty canvas, your ants make short work of the remaining pixels. The board counter drops to zero, the final block clears from your tray, and you achieve complete victory.
Key Moments in Colony Flow Level 2384
The Move That Opens Up the Board
The critical turning point in this stage occurs when you unlock the fourth column by claiming the key block. Prior to lifting that wooden barrier, your selection of purple blocks is severely constrained. Because the unicorn features a thick mane, large wings, and multiple hooves all rendered in deep purple, attempting to clear the board without column four inevitably forces you into a bottleneck where every waiting slot fills up with useless colors.
Unlocking column four provides instant access to the purple blocks needed to sustain your ant supply. Once that barrier disappears, the center of the board opens up, allowing you to dismantle the main body of the artwork without stalling.
Finishing the Remaining Food
The endgame requires careful discipline because individual, scattered tiles can easily mislead you into miscalculating block values. When only forty or fifty tiles remain on the board, selecting a block with a high number will leave that block lingering in your waiting area indefinitely if there are not enough matching tiles left to exhaust it completely.
The winning finish works because you deliberately reserve small single digit and low double digit blocks for the final sky stars and horn tips. By timing your selections so that each block finds just enough matching food to extinguish itself, you keep your waiting slots open until the very last ant returns to the nest.
How to Avoid Getting Stuck on Level 2384
The greatest danger on this stage is overloading your waiting slots with Connected Boxes when their matching food tiles are still buried deep inside the artwork. Connected Boxes take up two of your five precious slots instantly. If you pull a linked pair into the waiting row while both of those colors are shielded by outer layers of pink ground or cyan clouds, both blocks will sit completely idle. With only three slots remaining for your active moves, a single minor miscalculation will clog the board and end your game.
Another common pitfall is neglecting the wooden barrier in column four until it is too late. Some players focus entirely on clearing the mint green and light blue clouds along the upper edges of the board, using up all their easily accessible blocks from columns one, two, and five. If you burn through your auxiliary colors before opening column four, you will find yourself staring at purple tiles on the board with zero matching purple blocks in your available tray. Always plan your moves with the express goal of freeing the key block early.
Lastly, you must respect the physical paths carved by your ants. Tiles situated deep within the unicorn face or upper wing cannot be reached until the surrounding barrier pixels are consumed. Always work your colors from the outside inward, peeling away the perimeter ground before attempting to grab blocks that match internal details.
Final Thoughts
Conquering Colony Flow Level 2384 comes down to disciplined slot management, respectful handling of connected pairs, and an early focus on unlocking the wooden barrier in column four. By peeling away the lower pink and cyan ground first, you give your ant colony the wide avenues needed to tear through the massive yellow and purple unicorn. If you encounter any tricky block alignments or want to double check the exact movement timing, be sure to watch the walkthrough video above the article to guide your winning run.
Comments