
Profile Perfect Level 262 Answer
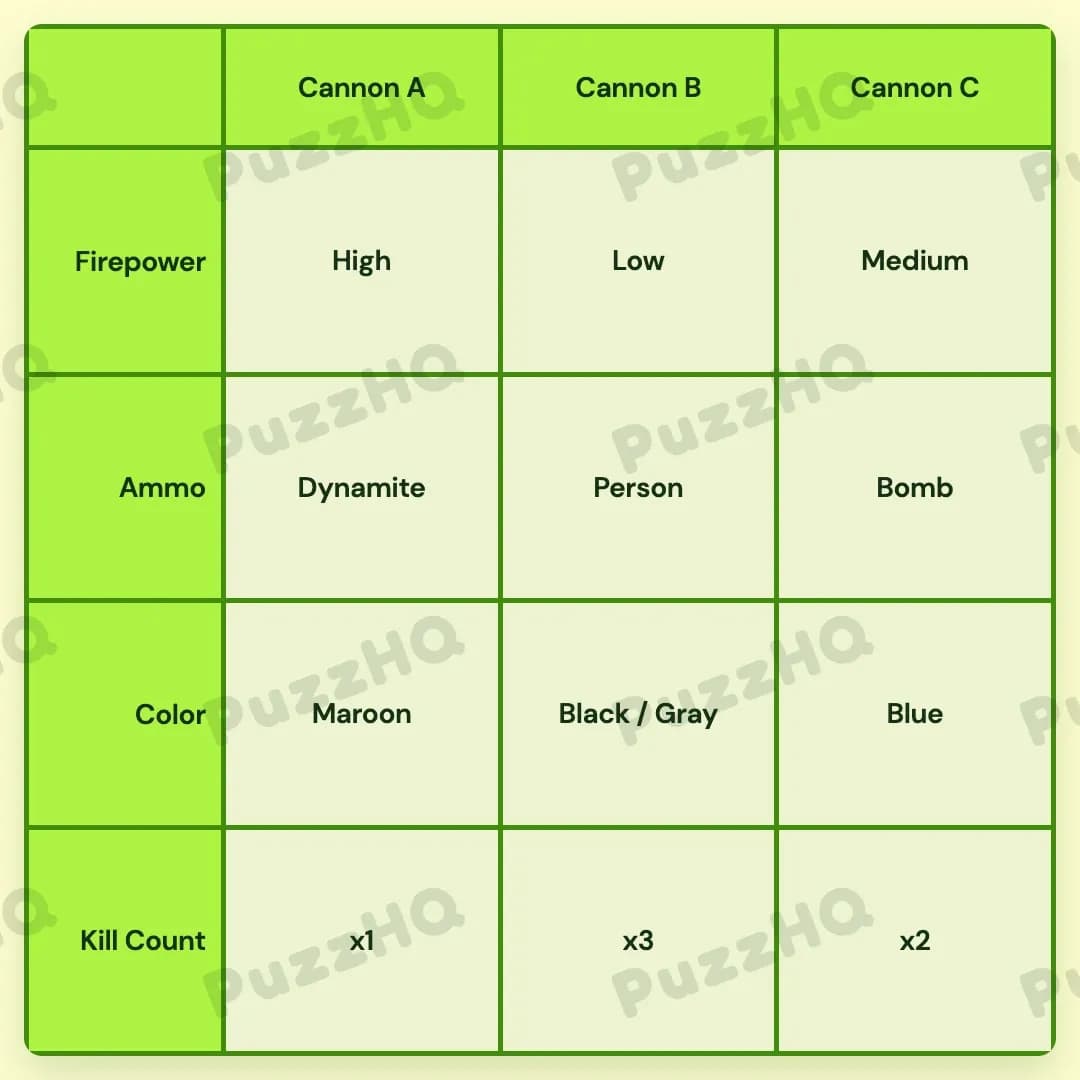
Here is the completed configuration for all three cannons across each category.
| Trait | Cannon A | Cannon B | Cannon C |
|---|---|---|---|
| Firepower | High | Low | Medium |
| Ammo | Dynamite | Person | Bomb |
| Color | Maroon | Black / Gray | Blue |
| Kill Count | x1 | x3 | x2 |
How I Solved Profile Perfect Level 262
The first thing I noticed when reading the clues was how directly the firepower traits were linked to specific cannon positions. Rather than having to cross reference multiple traits right away, the relative blast levels gave me a clear sequence from left to right that set the foundation for the entire board.
Firepower Established The Base Setup
I started by looking at the clues concerning cannon blast levels. One clue stated that Cannon B has less firepower than its neighbors, while another mentioned that Cannon C has a softer blast than Cannon A.
Since Cannon B sits in the middle between Cannon A and Cannon C, being weaker than both neighbors immediately meant Cannon B had to hold the Low firepower rating. That left High and Medium to be divided between the outer cannons. Because Cannon C has a softer blast than Cannon A, Cannon A had to be High and Cannon C had to be Medium.
In just two deductions, the entire Firepower row was completely locked in:
- Cannon A: High
- Cannon B: Low
- Cannon C: Medium
Circus Use And Ammunition Types
With the firepower values established, the ammunition clues became much easier to untangle. I knew from the clues that the cannon with Low firepower was slated for the circus tonight. For a circus act, loading a person into the cannon is the natural match, which pointed to Cannon B being loaded with Person ammo.
Next, a positional clue stated that the cannon on the left is not filled with Bomb. Since Cannon A is on the far left, it could not take the Bomb. With Cannon B already assigned to Person, the Bomb had to belong to Cannon C.
That left only one ammunition type unaccounted for, so Dynamite went directly to Cannon A.
Kill Counts Narrowed Down The Performance
Once the ammunition types were in place, I turned to the battle results. One clue mentioned that the Bomb killed many enemies, but was not the deadliest.
With three distinct count values across the grid (x1, x2, and x3), being neither the lowest nor the deadliest placed the Bomb squarely in the middle at x2. Since Cannon C held the Bomb, Cannon C received the x2 kill count.
Another clue pointed out that the Maroon cannon had a newbie operator and killed the fewest. That meant the fewest kills, x1, had to belong to whichever cannon was painted Maroon. Since Cannon C was already fixed at x2, the x1 count could only go to Cannon A or Cannon B. However, the deadliest count of x3 still needed a home, and Cannon B was the only open spot remaining if Cannon A took the lowest score.
Assigning x3 to Cannon B and x1 to Cannon A completed the Kill Count row cleanly.
Color Assignments Finished The Grid
The final step was to place the colors across all three cannons.
Because the clue tied the newbie operator of the Maroon cannon directly to the fewest kills, Cannon A had to be Maroon to match its x1 kill count. This also lined up with the clue noting that the high firepower cannon shares a similar color scheme with its red dynamite ammo.
For the remaining colors, one clue stated that there is no Black color on Cannon C, while another indicated that the cannon with Black color is mixed with other similar colors. That meant the combined Black / Gray paint had to go to Cannon B.
With Cannon A set to Maroon and Cannon B set to Black / Gray, the remaining color, Blue, naturally filled the final open slot on Cannon C.
The Point Where I Nearly Went Wrong
It is easy to misread the clue about the Maroon cannon and assume it refers to Cannon C simply because Cannon C had a softer blast than Cannon A. If you assign the lowest kill count to Cannon C before resolving the ammunition types, you end up placing the Bomb at x1 instead of x2.
The key detail is recognizing that the Bomb is described as having killed many enemies despite not being the deadliest. That specific wording rules out the bottom value of x1 just as firmly as it rules out x3, keeping Cannon C locked at x2 and ensuring Cannon A receives the x1 count alongside the Maroon color.
Looking Back At The Solution
The turning point of this puzzle was resolving the Firepower row right at the start. Figuring out that Cannon B was Low unlocked both the circus ammunition deduction and the relative blast hierarchy, allowing the kill counts and color traits to fall into place without any guesswork.
Comments