
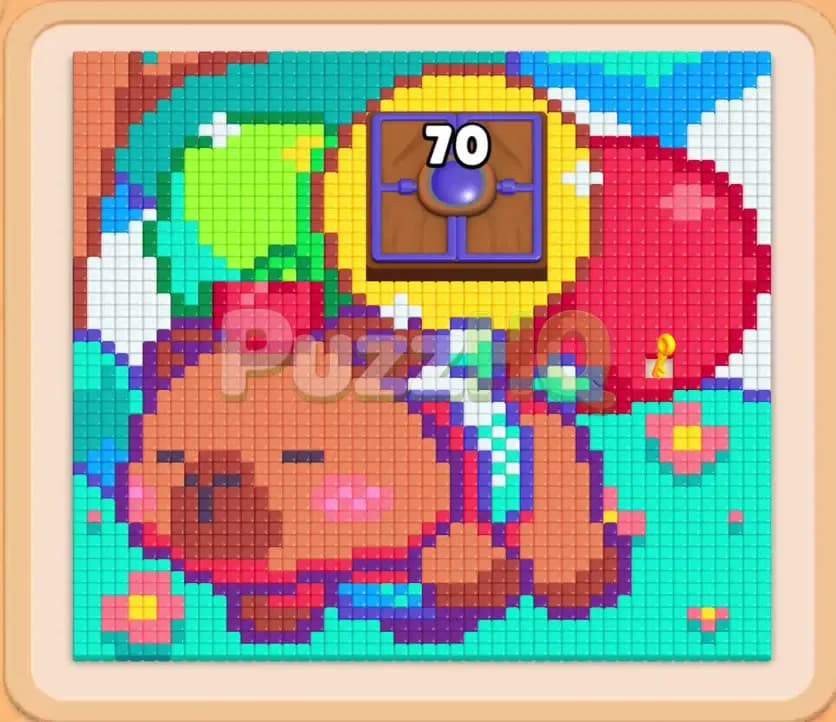
Colony Flow Level 897 gives you a colorful pixel art picture of a sleepy capybara resting with a bright red strawberry on its back against green foliage and teal water. You face a crowded tray filled with tricky obstacles that test your patience and your spatial planning right from the start. Clearing this stage without getting stuck requires careful control over the five waiting slots while managing linked pieces and locked elements.
Colony Flow Level 897 Overview
What You Are Working With
The pixel art canvas at the top of the screen displays a large brown capybara snoozing under a lush canopy of green leaves and sky blue accents, flanked by small pink flowers and bright teal background tiles. A massive locked chest sits squarely at the top center of the board, displaying a countdown that begins at seventy and demands key pickups from the tray before its contents release.
Below the picture, your ant nest sits ready to dispatch worker ants across open paths as soon as you feed them matching blocks. Between the nest and the lower board, you have five waiting slots. These slots hold any block you pull from the stack that cannot immediately drain all its value.
The block tray beneath the slots contains several rows of colored and numbered tiles. Red, pink, brown, green, yellow, teal, and blue blocks fill the grid, but ordinary blocks are not your only concern. This stage includes Hidden Box tiles marked with question marks that keep their identity secret until you clear away surrounding blocks and open up a direct route for them. You also have Connected Boxes joined by a solid colored bar that forces both linked pieces into your waiting area together, plus Lock and Key blocks that must be cleared to break the locks holding the upper chest shut.
What It Takes to Clear Level 897 Board
To clear the entire board on Level 897, you must guide your ants across every section of the capybara picture until not a single food tile remains. Achieving this goal requires balancing high capacity blocks with open eating lanes on the board.
The biggest threat on this level is slot congestion. Pulling large blocks when the board only exposes a few matching tiles will trap those blocks in your waiting area, choking off your capacity to maneuver. You have to peel back the picture from the outside edges inward, chew through the brown capybara body, gather the yellow keys to crack open the heavy central chest, and untangle the Connected Boxes without letting all five waiting slots fill up. Once you unlock the chest and digest the inner food tiles, you can clean up the remaining border pixels and wrap up the stage cleanly.
Colony Flow Level 897 Step by Step Solution
Step 1: Clear the outer red and pink tiles to establish initial movement lanes
Begin by pulling the exposed red and pink blocks from the top accessible row of your tray to target the large red strawberry and the pink blossoms along the perimeter. The red blocks immediately summon red ants from the nest hole, sending them marching in a tight line along the right side of the canvas where the strawberry sits. As these ants devour the outer edge, the numbers on your active red blocks drop rapidly from thirty nine down to zero, vanishing from your waiting slots and freeing up room for your next choices. Clear the small pink blocks right alongside them so the delicate pink blossoms near the capybara paws disappear, widening the pathway across the lower half of the picture. By focusing on these distinct colors on the outer edges first, you prevent your waiting slots from jamming while giving your colony plenty of open room to spread.
Step 2: Chip away at the brown capybara body to expose interior paths
Now that the lower borders are slightly clearer, select the light brown and dark brown blocks to start feeding on the main body of the capybara. The brown tiles make up the thickest cluster of food on the board, which means pulling a brown block gives your ants guaranteed work without stalling. Your ants chew through the capybara snout, paws, and curved back, steadily reducing the counter on your brown blocks and opening a large central void in the artwork. Watch the waiting slots closely during this phase and only pull a brown piece when you see an uninterrupted line of brown pixels ready for harvesting. Carving out the middle of the animal gives you direct sightlines toward the upper canopy and starts exposing the borders surrounding the locked chest.
Step 3: Draw out the key blocks to advance the chest counter
With the lower body cleared away, focus your attention on the tray blocks that carry the yellow key symbols. Pulling these key blocks assigns your ants to gather the essential tools needed to unlock the heavy chest sitting at the upper middle of the board. Watch the counter on the locked chest drop from seventy down through the fifties as your ants collect the keys and deliver them upward. Because these key blocks also carry regular color values, ensure that the matching food tiles are actually reachable on the board before you drag them into a waiting slot. Taking out these key blocks also shifts the lower rows of your tray, sliding previously trapped blocks into active positions and revealing more of the hidden tiles buried underneath.
Step 4: Manage the purple connected boxes without clogging your slots
Your tray contains two purple blocks welded together with a thick diagonal bar, forming Connected Boxes that must enter your slots as a pair. Before you touch this pair, look at your waiting slots and ensure that at least three slots are completely empty. Pull the connected pair upward into the waiting row. Because these blocks are linked, both will take up space simultaneously, temporarily reducing your margin for error. Send purple ants into the small purple highlights scattered around the capybara harness and lower floral accents. Let the purple ants work down their numbers until both connected blocks break apart and vanish from the tray, instantly restoring your open slot buffer to a comfortable level.
Step 5: Reveal the hidden boxes and clear the green canopy
Direct your focus to the upper left corner of the canvas where thick clusters of green and lime pixels form the overhead foliage. Pull the bright green blocks sitting in your active tray to unleash green ants directly into this lush area. While your green ants tear through the leaves, the question mark tiles in your tray will gain valid pathways, causing their surfaces to flip and reveal their true colors. Once a Hidden Box reveals its identity, plan your next move around whether its color matches tiles currently exposed on the board. Do not pull a revealed block into your waiting slots unless you can see a generous path of matching food ready for eating, otherwise that block will sit idle and threaten your run.
Step 6: Unlock the central chest and digest the inner food mass
Keep working on the remaining key requirements until the lock bar across the upper chest snaps open and the counter drops down to single digits before vanishing entirely. Opening this chest releases a dense patch of trapped food tiles directly behind the capybara back, presenting a rich buffet for your colony. Pull the corresponding colored blocks that match the newly uncovered inner tiles, including blue, red, and yellow pieces. Your ants will swarm into the center of the board along the broad highways you created earlier, tearing down the high value tiles in record time. Clearing this central cache removes the biggest obstacle on the board and leaves only scattered remnants along the frame.
Step 7: Sweep up the teal water and clear the final floating pixels
With the main subject and the chest completely eradicated, you only have scattered clusters of teal, cyan, and yellow pixels lingering around the canvas edges. Pull the high count teal blocks from your tray to send steady streams of blue and cyan ants into the bottom corners and along the far right wall. Since these are the final large blocks in your tray, you can afford to fill several waiting slots because the available board space is massive and the ants encounter zero obstructions. Watch the remaining numbers on your tray blocks tick down into single digits, then fade out one after another. As your last yellow and cyan ants finish off the remaining background pixels, the entire board clears out, and your colony finishes the stage with a complete victory.
Final Thought
Colony Flow Level 897 demands strict discipline with your waiting slots, especially when dealing with the linked purple boxes and the heavy requirements of the locked chest. If any part of the pathing or tray order feels difficult to picture from reading alone, take a moment to watch the video walkthrough above this guide to see every block pull and ant stream executed in real time.
Comments