
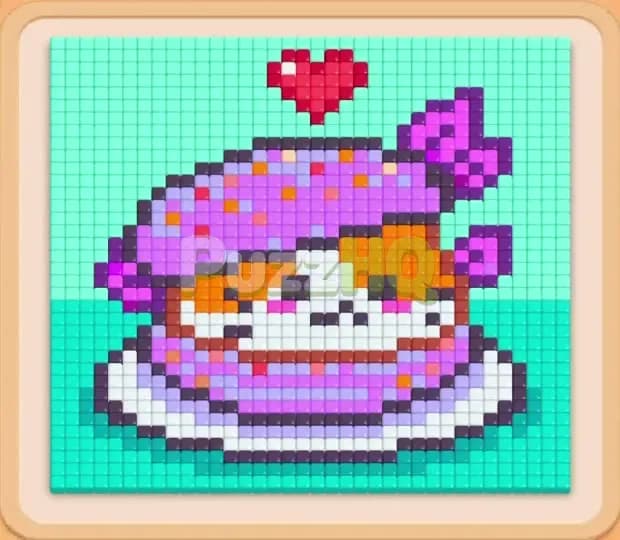
Colony Flow Level 214 presents a deceptively charming puzzle that will push your spatial planning skills to their limit. You are tasked with dismantling a lovely pixel art scene depicting a cat in a beret sitting under a red heart, but the tight tray columns and mystery elements make board management tricky. A single careless tap can flood your five waiting slots and lock your colony out of moves, so staying calm and reading the board ahead of time is your key to success.
Colony Flow Level 214 Overview
What You Are Working With
The top display features a vibrant food mosaic set against a soft mint background. In the center sits a chubby ginger and white cat wearing a lavender purple beret dotted with yellow spots, perched happily on a white and cyan saucer. A bright red heart hovers above the hat, completing the picture. Each individual pixel in this scene is a piece of food waiting for your ant army to devour it. Below the picture rests the nest hole where worker ants march out to consume tiles matching the active block color you supply.
At the bottom of the screen sits the block tray, divided into columns packed with numbered, colored blocks. You will notice that many of the lower blocks display question marks. These are Hidden Box tiles, a special element on this board that conceals both color and identity until the blocks sitting directly over them are cleared away. Because you cannot see what color rests inside a Hidden Box until it slides forward, you must maintain empty waiting slots to absorb surprises. You have five empty waiting slots situated above the columns. When you pull a block from a column, it jumps into one of these five slots, where it stays until worker ants finish eating all corresponding food tiles on the picture.
What It Takes to Clear Level 214 Board
Clearing Colony Flow Level 214 demands absolute discipline with your waiting slots. You lose immediately if all five waiting slots fill up with blocks whose colors have no accessible matching food tiles on the board. When an ant cannot find a direct path from the nest hole to the matching food color, that block sits completely idle in the waiting slot, freezing valuable real estate.
To guarantee a clean win, you must systematically peel away the outer perimeter before digging deep into the center. The vast mint green backdrop and the broad edges of the saucer provide wide, easy pathways for your ants. Clearing these large outer areas first exposes inner layers of ginger fur, white cheeks, and purple wool, while simultaneously unlocking the Hidden Box tiles buried in your tray. Always keep at least two waiting slots completely open whenever you reveal a mystery block, ensuring you never run into a lethal board lock.
Colony Flow Level 214 Step by Step Solution
Step 1: Clear the wide mint green backdrop to open ant lanes
Start your run by focusing entirely on the massive mint green expanse framing the cat and the heart. Select the high value mint block from the right side of your tray, which sends an immediate wave of mint ants sprinting around the exterior borders. As these ants chew through the outer edges, tap the secondary cyan blocks that target the rim of the saucer at the bottom. This clears out huge swaths of border tiles, widening the pathways leading toward the central figure. By using these large outer blocks first, you drain their numbers down rapidly, freeing up column space without jamming your five waiting slots. Watch the counters tick down as the mint frame vanishes, providing clear sightlines to the inner cat portrait.
Step 2: Clear the saucer base and route dark outline tiles
With the outer frame thinning out, turn your attention to the saucer beneath the cat. Pull the white and light lavender blocks to target the plate rim, giving your ants a direct route across the bottom of the board. As the saucer breaks apart, select the dark navy block from the right column to consume the deep outline pixels framing the base of the saucer and the sides of the cat. These dark tiles often act as barricades that prevent ants from reaching inner pockets. Releasing the navy ants now dismantles those structural lines. Keep a close eye on your five waiting slots during this sequence, making sure that every block you pull begins draining immediately so that no idle block lingers on your rack.
Step 3: Uncover the first row of Hidden Box tiles
Now that your top tray blocks have cleared room, the first layer of mystery tiles comes into play. Tap the revealed blocks sitting above the question marks, sending purple and peach ants out toward the lower beret line and the outer edge of the ginger face. As these front blocks empty out and leave the waiting rack, the Hidden Box tiles underneath slide forward and reveal their hidden shades. You will reveal a combination of lavender, red, and ginger orange blocks. Because you kept your waiting slots mostly clear in the previous step, your tray easily accommodates these newly revealed colors without any risk of jamming the board. Let the ants chip away at the lower facial contours while the numbers count down toward zero.
Step 4: Dismantle the purple beret and upper head accents
Direct your next moves toward the large purple beret resting atop the cat. Pull the medium purple blocks along with the lighter lavender blocks from your center columns. An army of purple ants immediately rushes up the newly cleared side channels, swarming the beret from both left and right. As the purple wool tiles disappear, the bright yellow accent dots on the hat become exposed and ready for harvesting. Pull the corresponding yellow and warm accent blocks from the tray to snap up these isolated dots. Clearing the beret removes a massive chunk of the upper board, which in turn unlocks the deeper mystery blocks sitting at the very bottom of the central tray columns.
Step 5: Peel away the white cheeks and ginger facial fur
With the beret mostly eaten away, focus your efforts on the cat face. Pull the white blocks sitting in your left columns to clear out the muzzle, cheeks, and chest area. White ants quickly stream across the center, leaving behind only the ginger orange patches that make up the ears and forehead stripes. Follow this up immediately by selecting the ginger orange blocks from the middle of your tray. The orange ants swarm the remaining facial patches, steadily reducing their numbers. Because the surrounding tiles are already gone, the ants enjoy wide open highways, allowing the block countdown numbers to drop in rapid succession and cycling your waiting rack quickly.
Step 6: Eliminate the red heart and clear the upper canopy
Now shift your focus straight to the top of the screen where the floating red heart remains intact. Pull the red blocks that were previously locked beneath the center mystery tiles. Red ants march directly up through the cleared space where the beret once sat, devouring the red heart pixel by pixel. At the same time, clean up any stray mint tiles still clinging to the very top corners of the sky by pulling the small remnant mint blocks from the right column. The heart dissolves quickly under the focused ant stream, leaving behind only scattered facial details and a few tiny saucer fragments near the bottom edge.
Step 7: Feed on the final crumbs to achieve victory
Take a careful look across the entire board to spot the final remaining food pixels. You will have just a few ginger whiskers, dark mouth pixels, and tiny white fragments left on screen. Pull the final low count blocks from the tray in exact order, starting with the dark line block for the mouth, followed by the white block, and finishing with the ginger orange block. Because every pathway across the board is now completely unobstructed, the ants sprint from the nest hole and instantly wipe out the last remaining specks. The final block hits zero, your waiting rack empties completely, and the level ends in a clean, perfect victory.
Final Thought
Colony Flow Level 214 tests your ability to juggle unknown mystery blocks while keeping your active channels completely unobstructed. If any particular tile transition or column order feels confusing while reading through these steps, be sure to watch the complete gameplay video provided above this article to watch the exact timing in real time. Keep your waiting rack clear, stay patient with your pulls, and you will knock this puzzle out with no trouble at all.
Comments